
Contents
If storm water has started leaking into your property, you need to act fast to limit ceiling damage and track the entry point before it spreads. You’ll need to inspect roofs, gutters, and drainage paths, then dry the affected area and assess what’s been compromised. The repair process doesn’t stop there, because hidden moisture and weak materials can trigger repeat failures unless you address the source correctly.
Key Takeaways
- Stop the water intrusion immediately, protect nearby areas, and switch off power if moisture reaches fixtures.
- Trace the storm water source by inspecting roofs, flashing, gutters, downspouts, drains, and drainage paths.
- Dry the affected area quickly with fans, dehumidifiers, open windows, and moisture checks on framing and drywall.
- Remove damaged drywall and insulation after drying, then repair with code-compliant materials and finished seams.
- Prevent future leaks by cleaning gutters, improving grading, sealing cracks, waterproofing vulnerable areas, and scheduling seasonal inspections.
Stop Ceiling Water Damage Now
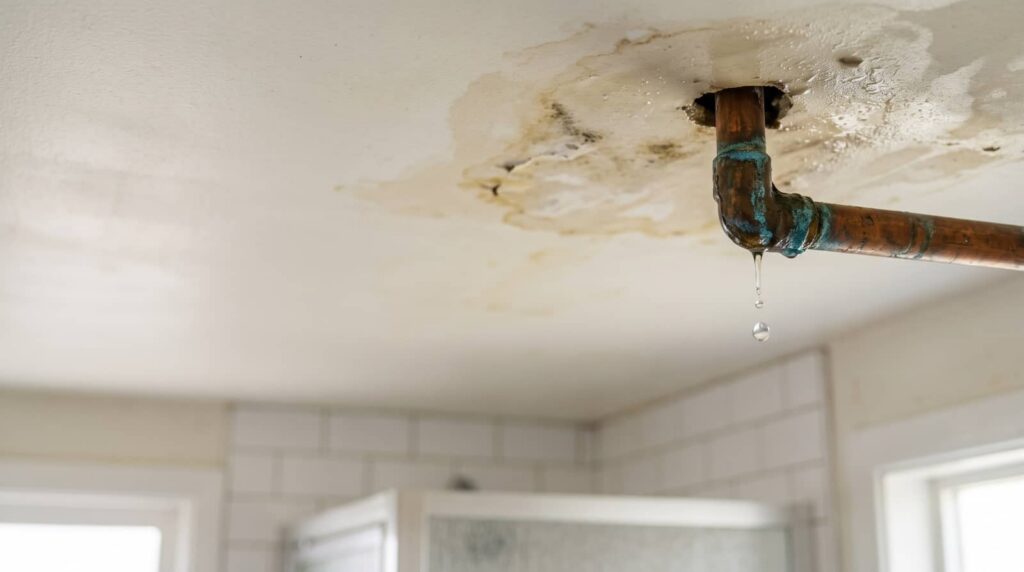
If you spot a stain, bulge, or drip in the ceiling, you need to act fast to stop water intrusion before it spreads. You should protect the room, place a container below the leak, and switch off power to nearby fixtures if moisture reaches them.
Then you can inspect the damaged area for soft drywall, peeling paint, or active dripping. Use ceiling maintenance best practices: document the issue, dry exposed surfaces, and keep airflow moving with fans and dehumidifiers.
For water stain repair, don’t seal over damp material; remove compromised finish only after it’s fully dry. When you act quickly and methodically, you help your home stay safe, and you stay part of a crew that handles problems with control, care, and precision.
Find Where the Storm Water Is Coming From
Start by tracing the storm water path from the highest likely entry point down to the visible leak, because water often travels before it appears inside.
You should inspect roofs, flashing, gutters, downspouts, wall penetrations, and nearby drainage systems in a clear sequence. Check for overflow marks, loose joints, blockages, and staining that point to a breach.
Then use leak detection methods like hose testing, moisture meters, and infrared scanning to narrow the source. Compare wet patterns with exterior features so you can match the entry point to the symptom.
If you live in a home with others, share findings quickly so everyone stays aligned. Precise mapping helps you fix the right defect, avoid repeat damage, and move forward with confidence together.
Dry Out the Ceiling and Leak Area
Remove standing water and expose the affected materials as soon as the leak source is confirmed.
You should open windows, run fans, and place a dehumidifier to accelerate evaporation.
Use moisture detection tools to check ceiling joists, framing, and nearby surfaces, because hidden dampness can spread damage even after the visible drip stops.
Keep airflow consistent across the leak area and reposition equipment until readings stabilize at normal levels.
If saturation is heavy, repeat targeted drying techniques in short cycles rather than relying on one pass.
You’re part of a careful repair routine when you monitor progress and document each reading.
Stay alert for cool spots, discoloration, or musty odors, since they signal lingering water.
A fully dry structure gives your team a cleaner, safer path forward.
Repair Damaged Drywall and Insulation
Once the area is fully dry, you can cut out any swollen, soft, or stained drywall and inspect the insulation behind it for compression, mold, or loss of thermal value.
Trim back to clean, solid edges, then remove debris and vacuum the cavity. If the drywall is damaged, complete drywall replacement with matching thickness and tape.
Choose insulation types that fit the cavity and local code; replace any wet, compacted, or contaminated material. Fiberglass, mineral wool, and foam each perform differently, so match the product to the space and moisture history.
Fit the new insulation snugly, but don’t overcompress it.
Afterward, reinstall the drywall, secure seams, and finish joints with compound. You’re restoring a safe, efficient assembly that feels right in your home.
Prevent Future Storm Water Leaks
To prevent future storm water leaks, inspect and maintain the full drainage path around your home before the next heavy rain. You should clear gutters, downspouts, and yard drains, then verify that water moves away from the foundation.
Check grading, seal cracks, and test sump pumps so your drainage systems stay reliable. Apply targeted waterproofing techniques to basement walls, window wells, and utility penetrations, because small failures can grow fast under pressure.
After each storm, look for damp spots, soil washout, or blocked outlets, and correct them immediately. When you stay proactive, you protect your space, reduce repair costs, and keep your household confident and secure together.
Schedule seasonal inspections, document findings, and replace worn components before they fail.
Frequently Asked Questions
How Much Does Storm Water Leak Repair Usually Cost?
You’ll usually pay $300–$3,000, depending on cost factors like leak location, pipe depth, and access. Repair methods range from patching to replacement, and you’ll get better results when you match the fix to the damage.
Can I File an Insurance Claim for Storm Water Damage?
Yes, you can file a claim if your insurance policy coverage includes storm damage. You should document the loss, request a storm damage assessment, and confirm exclusions, deductibles, and filing deadlines with your insurer.
How Long Does Professional Leak Repair Take?
Professional leak repair usually takes 1–3 hours for simple fixes, or 1–3 days if you need leak detection methods, access work, and material replacement. You’ll know repair timelines faster after inspection and diagnosis.
Do I Need a Plumber or Roofer for Storm Leaks?
You’ll usually need a roofer for exterior storm leaks and a plumber for interior pipe failures. Get a roof inspection first, then schedule plumbing maintenance if moisture tracks from walls, ceilings, or fixtures.
When Should I Replace Damaged Insulation Completely?
You should replace damaged insulation completely when moisture detection shows saturation, mold, or compressed fibers. Different insulation types recover differently, but if you can’t dry, clean, and verify performance, you’ll need full replacement.
Conclusion
When you spot a storm leak, act fast—like the homeowner who ignored a damp ring until a 2-foot ceiling section collapsed after the next rainfall. Stop the water, trace the source, dry the area, and repair the damaged materials. Then seal cracks, clear drains, and waterproof vulnerable surfaces. You’ll protect your structure, reduce repair costs, and prevent repeat failures. In storm water repair, speed and method aren’t optional; they’re your best defense.
Recent Posts
What Is 24 Hour Water Damage Cleanup?
If you’re dealing with a water emergency, 24 hour water damage cleanup gives you immediate
Ceiling Leak Mold Inspection Report Guide
If you’re dealing with a ceiling leak, you need to know how mold can develop,
5 Tips for Mold Inspection Reports
When you review a mold inspection report, you need to check more than just the