
Contents
After a storm, you need to stop the ceiling leak fast and check for sagging, stains, or wet insulation before the damage spreads. You’ll want to document everything for insurance, then dry the area with the right equipment and trace the leak to its source. The real challenge is knowing whether the problem is in the roof, hidden flashing, or the ceiling itself.
Key Takeaways
- Safely stop the leak by placing buckets, covering the roof opening, and shutting off nearby water if plumbing is suspected.
- Inspect the ceiling for sagging, stains, and wet insulation, then remove damaged insulation to prevent further spread.
- Trace the leak source in the attic or crawl space by checking roof flashing, vents, skylights, and plumbing lines.
- Document all ceiling damage with photos, videos, dates, and receipts for insurance and contractor claims.
- Remove standing water quickly and dry the area with fans, dehumidifiers, and wet/dry vacuums.
Stop the Ceiling Leak After Storm Damage
After a storm, you need to stop the ceiling leak fast to limit structural damage and mold growth.
First, locate the active entry point from the attic or roofline if it’s safe to do so. Then, place a bucket under the drip and relieve pressure by puncturing any bulging paint or drywall only if water is pooling.
Cover the exterior opening with a tarp, roofing tape, or a temporary patch to support emergency repairs. If access is unsafe, call a licensed roofer right away.
You can also shut off nearby water sources if you suspect plumbing involvement. Document the damage for insurance, then plan leak prevention steps such as clearing gutters, sealing flashing, and inspecting shingles after conditions improve.
Check for Sagging, Stains, and Wet Insulation
Inspect the ceiling for any sagging, since a bowed surface can signal trapped moisture and weakened materials.
Look for stains or discoloration that mark the leak path, and check the insulation above for dampness or compression.
If you find wet insulation, remove it promptly to limit further damage and reduce the risk of mold growth.
Inspect Ceiling Sagging
A sagging ceiling is one of the clearest warning signs that a leak has saturated the materials above it. You should stand back and inspect the plane for any bowing, rippling, or uneven seams. These shifts often mean the ceiling materials have absorbed water and lost strength.
In a storm recovery, you’re not alone in watching for this; careful checks help your household act before damage spreads. Use a flashlight to compare flat areas with the affected section, and note any soft spots that flex under light pressure.
Verify that moisture barriers above the ceiling are no longer performing as intended. If the sag worsens or the surface feels unstable, limit access below it and arrange professional support. Fast attention protects your home and supports a safer repair plan.
Identify Stains And Wet Insulation
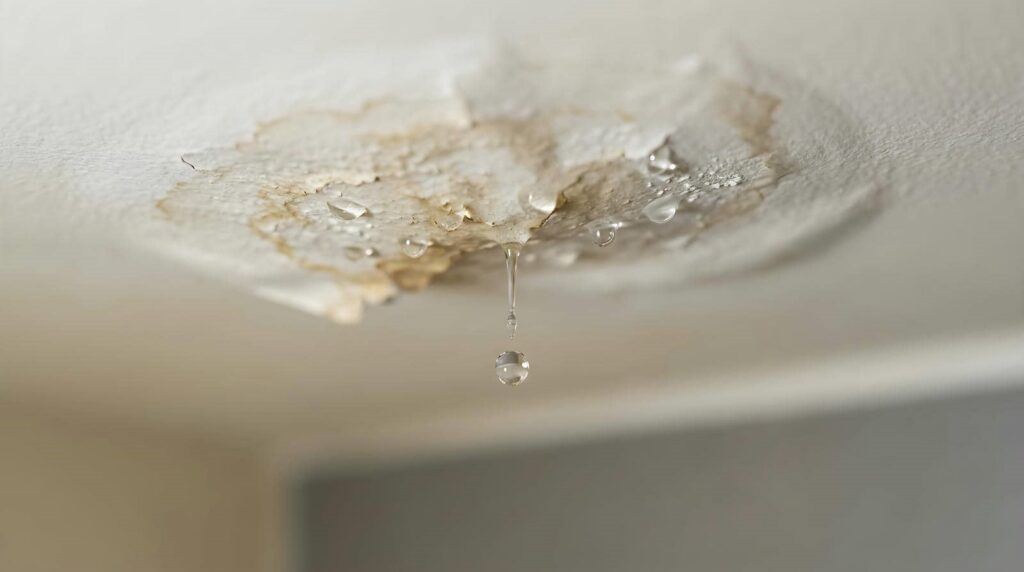
Water stains often reveal the leak’s path before the source is obvious, so you should look closely for brown rings, yellowing, bubbling paint, or dark patches on the ceiling surface.
Next, check for sagging areas that feel soft or bowed, because trapped moisture can weaken the drywall and framing above you. Use stain identification to map where water entered and spread, then compare those marks with nearby joints, vents, and light fixtures.
For insulation assessment, access the attic or ceiling cavity and test the insulation for dampness, clumping, or a musty odor. Wet insulation loses performance and can hide active leaks, so mark any affected sections for removal.
You’re not dealing with this alone; careful inspection gives your repair team a clear starting point.
Track Down the Leak Source
Before you repair a ceiling leak, you need to pinpoint where the water is entering, because the visible stain rarely sits directly below the actual source.
Start leak detection in the attic or crawl space, tracing damp framing, insulation, and fasteners along the water path. Check roof penetrations, flashing, vents, skylights, and valleys for gaps or lifted materials.
If the ceiling sits under plumbing, inspect supply lines, drains, and fixtures for active drips. Use a flashlight and moisture meter for accurate source identification, then mark the suspected entry point.
You don’t have to guess; a careful, methodical check helps your household stay calm and confident.
Once you isolate the origin, you can plan the right repair and stop further spread.
Document Ceiling Damage for Insurance Claims
Take clear photos and short videos of every affected area so you can support an insurance claim with solid evidence. Capture wide shots that show room context, then close-ups of stains, cracks, bubbling paint, sagging drywall, and any damaged fixtures.
Record dates, times, weather details, and brief notes about what you see. Keep receipts for towels, tarps, buckets, and any emergency services; they help verify losses.
Save copies of all messages with your insurer and contractor in one folder, so the document process stays organized and easy to follow. If you belong to a homeowners’ association, notify them too and retain their responses.
Clear records strengthen your claim, reduce delays, and help you feel prepared while your team works with you through the restoration process.
Remove Water and Dry the Ceiling Fast
Start removing standing water as soon as it’s safe to do so, because fast action limits ceiling collapse, mold growth, and structural damage.
You can protect your space by using proven water removal techniques and the right drying equipment options. Work carefully and keep the area ventilated.
- Use a wet/dry vacuum for shallow pooling.
- Place buckets or towels under active drips.
- Run fans to move air across damp surfaces.
- Set a dehumidifier to pull moisture from the room.
Check the ceiling’s surface for cool, soft, or sagging areas, and continue drying until it feels firm and stable.
You’re not handling this alone; steady, methodical drying helps you regain control and supports the rest of the restoration process.
Fix Roof and Hidden Storm Leaks
Once the ceiling is dry enough to inspect safely, you need to find and stop the source of the leak so the damage doesn’t return. Check shingles, flashing, vents, skylights, and fasteners for cracks, gaps, or wind lift.
You should also inspect the attic for wet framing, dark staining, and drips that point to hidden storm paths. Seal minor gaps with roofing cement or compatible sealant, and replace damaged shingles or flashing sections right away.
If water entered through siding, gutters, or a wall penetration, correct that route too. These roof maintenance tips help you protect your home and keep your crew on solid footing.
As part of your storm preparedness strategies, schedule a full roof inspection after major weather, so small failures don’t grow into costly ceiling repairs.
Test for Mold After Ceiling Water Damage
Even after you’ve stopped the leak, ceiling water damage can leave behind hidden mold that needs prompt testing. You should inspect the area within 24 to 48 hours, because moisture drives growth fast.
Use a moisture meter, then collect a surface swab or air sample if staining, odor, or soft spots persist. A certified inspector can identify common mold types and tell you whether cleanup is local or widespread. You’ll feel better knowing the data, not guesswork, guides your next steps.
- Test suspicious materials, not just visible spots
- Compare indoor and outdoor air samples
- Document readings, photos, and odors
- Address humidity to support mold prevention
Restore Drywall, Paint, and Texture
After the area is fully dry and cleared for repair, you can restore the damaged drywall, paint, and texture in a controlled sequence. Cut out softened sections, then match replacement pieces to the existing drywall types so the patch fits flush and stays stable.
Secure the new board, tape the seams, and apply joint compound in thin, even coats, sanding between passes for a level surface. Once the repair feels smooth and dry, prime it to seal porosity and improve paint adhesion.
Then use matching paint sheen and color for a seamless blend. If the ceiling has visible patterns, practice texture techniques on scrap first, then recreate the finish carefully.
You’re rebuilding a safe, consistent space that feels like home.
Frequently Asked Questions
How Soon Should I Call a Professional After Noticing Ceiling Water Damage?
Call a professional immediately after you notice ceiling water damage. Quick action protects your repair timeline, limits structural issues, and helps you feel supported. You’ll reduce risk, document damage, and speed restoration.
Can Storm Damage Leaks Affect Electrical Wiring Inside the Ceiling?
Yes—storm leaks can absolutely soak ceiling wiring, creating serious electrical safety hazards. You’ll want a wiring inspection fast; hidden moisture can spark shorts, corrosion, or worse. You’re not alone, and quick action keeps you protected.
What Temporary Materials Can Safely Cover a Leaking Ceiling?
You can use plastic sheeting, peel-and-stick roofing membrane, or waterproof tarp for temporary patching. These waterproof solutions safely divert water until repairs begin, and you’ll stay protected, included, and confident.
Will Homeowners Insurance Cover Emergency Drying Equipment Costs?
Usually, you’ll get coverage if your insurance policy includes sudden water damage, and you document the claim process quickly. You should call your insurer, keep receipts, and confirm emergency drying equipment limits before renting.
How Do I Prevent Future Storm Leaks Around Attic Vents?
You can prevent future storm leaks around attic vents by sealing flashing, replacing damaged boot collars, and scheduling regular vent maintenance. Check for gaps after storms, use leak detection inspections, and keep fasteners tight.
Wrap-Up
When you finish this repair, you’re not just patching a ceiling—you’re restoring a shield. The stains, sagging drywall, and hidden drips were warning flags; now they’re signals you’ve acted in time. Keep the structure dry, document every detail, and verify the leak source is sealed. With steady cleanup and careful restoration, your ceiling can stand firm again, like a repaired roofline after the storm, ready to protect your home.
Recent Posts
What Is 24 Hour Water Damage Cleanup?
If you’re dealing with a water emergency, 24 hour water damage cleanup gives you immediate
Ceiling Leak Mold Inspection Report Guide
If you’re dealing with a ceiling leak, you need to know how mold can develop,
5 Tips for Mold Inspection Reports
When you review a mold inspection report, you need to check more than just the