
Contents
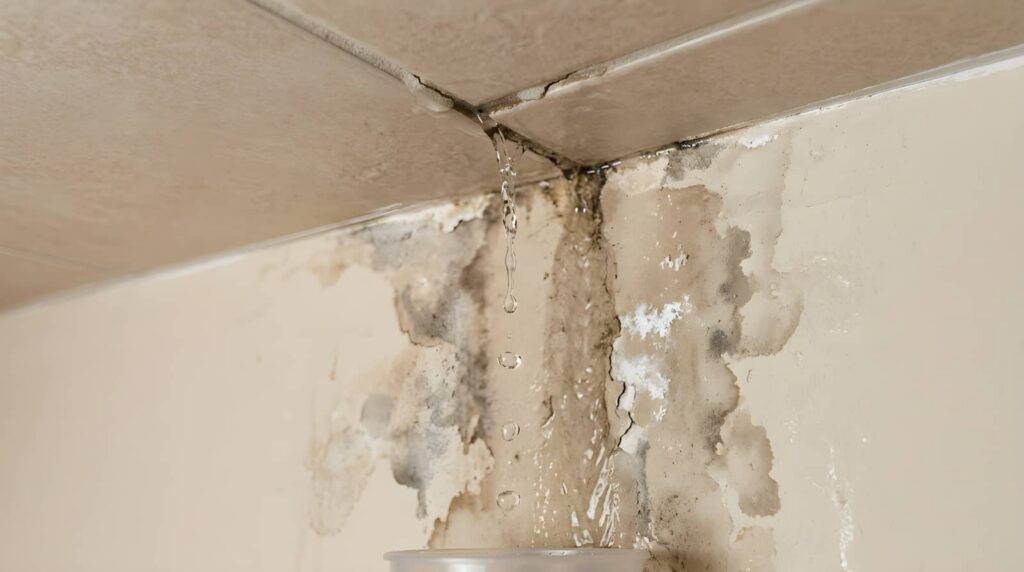
After a ceiling leak, you need to act fast to limit damage and reduce repair costs. Start by stopping the water source, then move furniture and electronics out of the way. Check for sagging drywall, wet wiring, and active drips before you do anything else. Next, document the damage and begin drying the area right away. What you miss in the first hour can shape the full repair later.
Key Takeaways
- Shut off the water source if safe and move furniture, electronics, and rugs away from the leak.
- Place buckets and plastic sheeting under the leak to catch water and protect flooring.
- Inspect for ceiling bulging, soft spots, or electrical hazards, and shut off power to wet circuits if needed.
- Take clear photos, note dates and damage details, and save receipts for cleanup supplies.
- Dry the area with fans and a dehumidifier, then remove damaged ceiling material and repair after it is fully dry.
Stop the Leak and Protect the Room
If you can do so safely, shut off the water source right away and stop the leak at its origin.
Then move furniture, rugs, and electronics out of the drip zone to limit water damage.
Place a bucket or pan under the leak and line it with towels to catch runoff.
If water is spreading, lay down plastic sheeting or trash bags to shield flooring and nearby belongings.
Open nearby windows only if conditions are safe, and use towels to blot standing water.
Take quick photos for records, then call a qualified plumber or building manager for help.
These emergency measures help you control the situation and protect your space while you wait for repairs.
Stay calm—you’re handling the first critical step well.
Check for Sagging and Electrical Risks
Now inspect the ceiling below the leak for bulging, soft spots, or cracks, because standing water can strain the drywall or plaster and lead to a partial collapse. You’re looking for sagging signs that mean the surface has lost strength.
Keep everyone clear of the area if the ceiling feels spongy or shifts under light pressure.
- Watch for brown rings or widening seams.
- Listen for dripping inside the cavity.
- Check nearby light fixtures for heat or flicker.
- Shut off power to wet circuits if you can do it safely.
- Call an electrician when water reaches wiring, boxes, or fans.
Treat visible moisture around fixtures as electrical hazards, not minor stains.
If you’re unsure, stay out and wait for a pro.
Document the Ceiling Leak Damage
Before you clean up or make repairs, document the damage with clear photos and short notes. Take wide shots of the ceiling, walls, floors, and any stained or swollen materials, then zoom in on cracks, bubbling paint, and damaged fixtures.
Add the date, room name, and leak source if you know it. Keep your notes factual: where the water entered, how far it spread, and what items were affected.
Save receipts for temporary protection, cleanup, and inspection visits, since they support insurance claims and help you track repair costs.
Store everything in one folder on your phone or cloud drive so you can share it fast with your adjuster, contractor, or landlord. Good records help your household stay organized and backed up.
Dry the Area Before Mold Starts
Dry the area as soon as possible to slow mold growth and limit further damage. You’re protecting your home and your crew of helpers when you act fast.
Use practical drying techniques to remove moisture from drywall, framing, and trim. Start with airflow, then move to dehumidification for mold prevention.
- Open nearby windows if weather allows.
- Run fans to push damp air out.
- Set a dehumidifier in the wet zone.
- Lift soaked materials off the floor.
- Check hidden spots behind furniture and baseboards.
Keep the room warm, but not hot, so surfaces dry evenly. Replace saturated towels often.
If the leak soaked insulation or soft materials, remove them carefully so moisture doesn’t linger. Stay consistent for the best results.
When to Get a Mold Inspection?
Get a mold inspection if the leak lasted more than 24 to 48 hours, if you see visible growth, or if you smell a musty odor that won’t clear after drying.
You should also act if the ceiling material stayed wet, the stain keeps spreading, or you’re noticing more allergy-like symptoms.
A qualified inspector can check hidden cavities, measure moisture, and confirm whether mold growth has started behind surfaces.
That matters because delayed testing can let problems expand and raise health risks for everyone in the home.
If you live with kids, older adults, or anyone with asthma, don’t wait for proof.
An inspection gives you clear next steps and helps your household stay safe, informed, and supported.
Fix the Ceiling Leak Source Fast
Find the leak source first by checking the roof, plumbing lines, fixtures, and any wet insulation above the stain.
Then stop water entry right away with a bucket, shutoff valve, tarp, or temporary patch to limit further damage.
If you can’t isolate the source fast, contact a repair pro so they can diagnose and fix it safely.
Locate Leak Source
Start by tracing the leak path from the ceiling stain to the highest wet point, because water often travels before it drips. You’ll use leak detection to narrow the source without guessing.
Check the attic, roof deck, supply lines, drain pipes, and nearby vents; a plumbing inspection often reveals a loose fitting or pinhole fast.
Look for these signs:
- darkened wood
- bubbling paint
- rusted fasteners
- damp insulation
- mineral streaks
Feel along joints and around penetrations with a dry hand or paper towel. Photograph each suspect area so you can compare changes.
If you’re part of a building team, share findings quickly so everyone stays aligned. Don’t assume the stain marks the source; it usually marks the last stop.
Focus on the highest wet point, then map every clue.
Stop Water Entry
Once you’ve traced the source, stop the water at once so the damage doesn’t spread. Shut off the fixture valve, then close the main supply if the leak keeps feeding the ceiling.
If the issue comes from a roof opening, cover it with a tarp and weights until weather clears. For an active pipe burst, turn off power to wet areas before you move nearby items.
Open nearby faucets to relieve pressure and reduce drips. Contain runoff with buckets and towels, and keep steady airflow moving to slow water damage.
This quick emergency response protects your home and helps your household stay calm, safe, and ready for the next step together.
Check the ceiling below for fresh dripping every few minutes.
Contact Repair Pro
Call a licensed plumber, roofer, or water-damage specialist as soon as you’ve stopped the leak so they can fix the source fast and prevent repeat damage.
You need professional services because hidden failures can spread moisture behind drywall, under shingles, or through joints. A pro can trace the path, confirm the source, and use repair techniques that match the material and severity.
- Check pipe fittings, supply lines, and valves
- Inspect flashing, shingles, and roof penetrations
- Test ceilings, attic framing, and insulation
- Replace damaged sealant, sections, or components
- Document the repair for your records
When you act quickly, you protect your home and stay in a community of owners who fix problems before they grow.
Restore the Water-Damaged Ceiling
After the source of the leak is fixed and the ceiling has dried completely, remove any loose, sagging, or stained material so you can assess the full extent of the damage.
Cut back compromised drywall or plaster to solid edges, then clean dust and debris. If you see mold, stop and call a pro.
Match the replacement to your ceiling materials, whether drywall, plaster, or acoustic tile. Tape joints, apply setting compound in thin coats, and sand between passes.
Prime repaired areas with a stain-blocking primer to seal any remaining water stains and prevent bleed-through. Finish with matching paint or texture so the repair blends in.
Work carefully, and you’ll bring the ceiling back to a safe, clean state your household can trust again.
Frequently Asked Questions
How Do I Tell if the Leak Is From Plumbing or the Roof?
Check the leak’s location: if it worsens with rain, you likely need a roof assessment; if it appears near fixtures or pipes, schedule a plumbing inspection. You’ll spot patterns faster with both.
Should I File an Insurance Claim for a Small Ceiling Leak?
Yes, if your insurance coverage likely exceeds your deductible, file a claim after a leak assessment. You’ll protect your home, preserve your options, and stay connected with your insurer’s repair community.
Can Ceiling Leak Damage Affect Indoor Air Quality?
Yes, ceiling leak damage can hurt your air quality by promoting mold growth and releasing spores. You should dry materials fast, fix the source, and inspect insulation, drywall, and ventilation to protect your home.
How Long Should I Wait Before Repainting the Repaired Ceiling?
Wait until the ceiling drying is complete, then let repairs sit 24 to 48 hours before repainting. You’ll get better paint curing, fewer bubbles, and a finish that blends cleanly with your ceiling.
What Professionals Should I Call for Hidden Water Damage?
Call leak detection services first, then water damage restoration pros to trace the quiet trouble, dry hidden cavities, and prevent further loss. You’ll fit in with a team that knows structural moisture fast.
Final Thoughts
By now, you’ve turned a dripping ceiling into a controlled cleanup. Shut the leak, protect the room, and watch for sagging or live wires before the damage spreads. Dry every damp surface quickly, so stale moisture doesn’t invite mold. If stains linger or the odor turns earthy, call for an inspection. Then repair the source, replace the damaged ceiling, and restore the surface so your room feels solid, clean, and safe again.
Recent Posts
What Is 24 Hour Water Damage Cleanup?
If you’re dealing with a water emergency, 24 hour water damage cleanup gives you immediate
Ceiling Leak Mold Inspection Report Guide
If you’re dealing with a ceiling leak, you need to know how mold can develop,
5 Tips for Mold Inspection Reports
When you review a mold inspection report, you need to check more than just the