
Contents
When a burst pipe floods your home, water can spread faster than you’d think. 24/7 burst pipe water removal means you get immediate, round-the-clock extraction, drying, and damage control before moisture soaks deeper into floors, walls, and ceilings. You’ll want to know what happens next, because the first few hours can decide whether you face a minor repair or a major restoration.
Key Takeaways
- 24/7 burst pipe water removal is emergency service that extracts standing water any time, day or night, after a pipe breaks.
- It includes shutting off the water, locating the leak, and preventing water from spreading into walls, floors, and furniture.
- Crews use pumps, air movers, and dehumidifiers to remove water and dry affected materials quickly.
- Technicians inspect hidden moisture with meters and thermal imaging to reduce mold growth and structural damage.
- Fast professional response helps protect electrical systems, salvage materials, and support insurance claims.
Why Burst Pipe Water Damage Spreads Fast
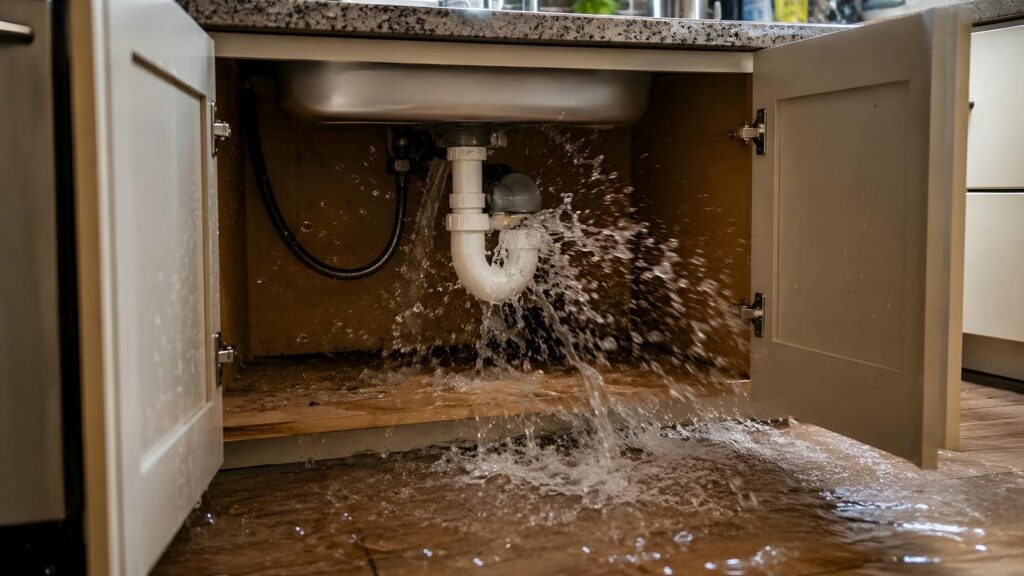
When a pipe bursts, water spreads fast because pressure forces it through gaps, seams, and porous materials almost immediately.
You’ll see water flow under flooring, behind baseboards, and into wall cavities before you can fully inspect the source. Gravity pulls it downward, while capillary action wicks it into drywall, insulation, and wood fibers.
If your home has open pathways like vents or unsealed edges, the spread gets worse. Warm air can also speed evaporation, raising humidity and pushing moisture deeper into materials.
That’s why moisture control matters from the start: the longer water sits, the more surfaces it reaches. You’re not dealing with a small puddle; you’re facing a fast-moving intrusion that can affect connected rooms, shared structures, and the people living there.
Stop the Leak and Protect Your Home
First, shut off the water at the main valve or the nearest isolation valve to stop the flow and limit further damage.
Then, inspect the pipe, fittings, and nearby walls for active dripping or staining. If you can’t find the source, use leak detection methods like checking meter movement, listening for hissing, and watching for wet spots.
Move furniture, electronics, and rugs away from the area to protect your home and keep the space safe. Place towels or a bucket under the leak if you can do so without touching damaged wiring.
Call for emergency repairs right away so a technician can isolate the break and restore control. Acting fast helps you stay in control, reduces stress, and keeps your home part of the solution.
What Happens During Water Removal
During water removal, you’ll see emergency extraction remove standing water fast to limit further saturation.
Next, crews set up drying and dehumidifying equipment to pull moisture from materials and the air.
They also complete damage assessment steps to identify affected areas and guide the repair plan.
Emergency Water Extraction
Emergency water extraction starts by removing standing water as quickly as possible with high-capacity pumps and truck-mounted vacuums.
You get an emergency response that prioritizes water safety, isolates the affected area, and checks for electrical hazards before work begins.
Technicians map water depth, select extraction points, and remove pooled water from floors, cavities, and low spots. They also pull water from carpet and padding to limit further spread.
You’ll see crews move methodically so no area gets missed. This step reduces contamination risk, protects building materials, and prepares the space for the next phase.
Because burst pipe losses move fast, speed matters, and a coordinated team helps you regain control sooner and keep your property in the right hands.
Drying And Dehumidifying
Once standing water is out, technicians set up air movers and dehumidifiers to pull moisture from floors, walls, framing, and hidden cavities.
You’ll see them position equipment to create balanced airflow, speed evaporation, and keep damp materials from holding water.
They monitor humidity, temperature, and surface moisture so they can adjust dehumidification techniques as conditions change.
This moisture control step helps stabilize the space and reduce lingering wetness in building materials.
You stay informed while the crew checks progress and keeps drying focused on the areas that need it most.
Proper drying also limits musty odors and helps your home return to a safe, usable state faster, so you can feel confident the job’s moving the right way.
Damage Assessment Steps
As technicians continue water removal, they’ll inspect the full extent of the damage to determine what’s salvageable and what needs replacement. You’ll see them check walls, flooring, insulation, and cabinetry for damage indicators like staining, swelling, warping, and microbial growth.
They’ll use assessment tools such as moisture meters, thermal imaging, and hygrometers to map hidden wet areas and verify drying progress. You should expect them to document affected materials, note contamination risks, and separate structural damage from surface damage.
This step helps your team make fast, accurate decisions about repairs, contents handling, and restoration priorities. When you stay informed during assessment, you can work with the crew more confidently and keep the process organized, safe, and efficient.
Dry Floors, Walls, and Ceilings
You’ll need to dry floors with extraction, air movers, and dehumidifiers to stop moisture from staying in the structure.
You’ll also remove trapped wall moisture by opening cavities if needed and monitoring readings until the material reaches a safe level.
For ceiling leak cleanup, you’ll inspect for sagging or saturation, drain any trapped water, and dry the area before repairs begin.
Floor Drying Methods
Floor drying starts with removing standing water, then using air movers and dehumidifiers to drive moisture out of the surface and subfloor.
You’ll get the best results by mapping affected areas, lifting wet rugs, and opening baseboard edges where needed.
Use floor drying techniques like directed airflow, heat control, and moisture monitoring to confirm effective drying.
Keep equipment running continuously and reposition it as readings drop, so you don’t leave hidden damp spots behind.
If you’re working with hardwood, laminate, or tile, adjust airflow to match the material’s response and protect finishes.
You belong in a process that’s measured, steady, and accountable, so log moisture levels until the floor reaches safe targets.
Wall Moisture Removal
Once floor drying is underway, inspect wall cavities, baseboards, and the lower drywall edge for trapped moisture. Then use moisture meters to mark what still needs attention. You’ll keep the space safer by pairing moisture detection with targeted airflow and dehumidification.
If readings stay elevated, cut small access points, dry the cavity, and reassess until levels normalize. Use these steps:
- Remove trim only where readings justify it.
- Direct air across damp wall treatments, not just the room.
- Recheck hidden areas after each drying cycle.
Act fast, stay methodical, and document every reading so your crew can work as one.
Clean, dry walls help prevent odors, swelling, and hidden damage, and they show your team you’re handling the loss with care and confidence.
Ceiling Leak Cleanup
When a ceiling leak shows up, inspect the stained area, surrounding insulation, and the drywall below for active moisture. Then map the wet zone with a moisture meter before you start drying.
Shut off the source, protect the floor, and pull down saturated insulation so air can move freely. Set up air movers and a dehumidifier to dry the ceiling cavity, then monitor humidity and surface readings until they stabilize.
Clean and disinfect affected drywall and framing to reduce odor and microbial growth. If water stains remain, cut out compromised material and prepare for ceiling repair.
Dry nearby walls and floors at the same time so hidden moisture doesn’t spread. You’re not handling this alone; a tight, coordinated cleanup helps your home recover fast and safely.
When to Call for Mold Inspection
If water sat inside walls, under flooring, or in insulation for more than 24 to 48 hours, you should schedule a mold inspection as soon as the area is dry enough to assess. You’re protecting your space and your people from hidden mold growth.
Call quickly if you notice musty odors, staining, or recurring damp spots.
Increase inspection frequency after a burst pipe, even if surfaces look dry.
Book an inspection before repairs close up materials and trap moisture.
A prompt inspection helps you confirm whether contamination has started and whether conditions still support growth.
You don’t need to guess; you need a clear answer. Acting early keeps your home safer, limits disruption, and helps you stay in control with the rest of your community-minded recovery plan.
What Pros Inspect After a Burst Pipe
A professional inspection after a burst pipe focuses on the full path of water damage, not just the visible wet area. You’ll see pros check the break point, connected lines, fittings, and nearby valves for stress or hidden leaks.
They use pipe inspection techniques to trace water under flooring, behind walls, and inside cavities, then verify moisture levels in materials, framing, and insulation. With professional assessment tools like moisture meters, thermal imaging, and borescopes, they map the spread and spot trapped water you can’t see.
They’ll also assess how far water reached into finishes and structural components, so your repair plan matches the actual damage. This careful review helps you feel informed, supported, and ready for the next step.
How to Prevent Future Pipe Bursts
To prevent future pipe bursts, you’ll want to control the conditions that cause pressure, corrosion, and freezing. You can keep your system safer by checking weak points, sealing air leaks, and maintaining steady indoor heat.
Good temperature control lowers freeze risk, while pipe insulation protects exposed runs in attics, crawlspaces, and exterior walls.
- Inspect pipes seasonally for rust, mineral buildup, and damp spots.
- Install pipe insulation on vulnerable lines and replace damaged sections fast.
- Keep cabinets open during cold snaps and maintain consistent thermostat settings.
You’re not alone in this maintenance; a few routine checks help your home’s plumbing stay dependable.
If your water pressure spikes, have a pro test the system and adjust valves before stress turns into another burst.
Should You File an Insurance Claim?
Whether you should file an insurance claim depends on the damage size, your deductible, and whether the loss is covered under your policy. If repairs cost less than or close to your deductible, you may save time by paying out of pocket.
If water damaged flooring, drywall, or contents, start the insurance process quickly and document everything with photos, receipts, and a cleanup log. Call your insurer, ask what they need, and confirm the claim timeline so you can plan repairs without delays. You’ll feel more in control when you know what’s covered and what isn’t.
If moisture remains, keep drying equipment running and protect unaffected areas. When in doubt, get a professional estimate first, then decide with your claims adjuster.
Frequently Asked Questions
How Quickly Can 24/7 Burst Pipe Water Removal Begin?
You can usually start 24/7 burst pipe water removal within minutes of your call. A rapid response team arrives fast, performs damage assessment, and begins extraction, helping you protect your property and feel supported.
Can Water Removal Services Handle Frozen Pipe Bursts?
Yes, you can see water surging from a frozen burst, and we’ll handle it. We extract water, dry materials, and inspect damage. Good frozen pipe prevention and winter plumbing maintenance reduce repeat failures.
Is Emergency Water Removal Available on Holidays and Weekends?
Yes, you can get emergency water removal on holidays and weekends; providers offer holiday availability and weekend services. You’ll stay protected with fast response, drying, and cleanup, so you’re not dealing with damage alone.
What Equipment Is Used During Burst Pipe Water Extraction?
You’ll use pumping systems, extraction vacuums, and dehumidification tools, like a rescue crew clearing a flooded fortress; they remove standing water fast, then dry walls, floors, and hidden cavities so you fit back in safely.
Does 24/7 Water Removal Include Sewage Contamination Cleanup?
Not always—you’ll need separate sewage cleanup if contaminated water’s involved. You should treat contamination risks seriously, because 24/7 water removal handles extraction, but biohazards, disinfection, and disposal usually require specialized cleanup to keep your space safe.
Review
When a pipe bursts, water can race through your home like a sudden flood, soaking floors, climbing walls, and seeping into ceilings. Fast 24/7 water removal helps you stop the spread, dry hidden moisture, and reduce mold risk before damage settles in. If you act quickly, you give your home the best chance to recover cleanly and safely. Stay alert, check for leaks, and call pros as soon as water starts moving.
Recent Posts
24/7 Water Damage Cleanup Checklist
At 2 a.m., you notice water pooling under your laundry room wall, and you have
What Is 24 Hour Water Damage Cleanup?
If you’re dealing with a water emergency, 24 hour water damage cleanup gives you immediate
Ceiling Leak Mold Inspection Report Guide
If you’re dealing with a ceiling leak, you need to know how mold can develop,