
Contents
You can fix storm water damage yourself if you act fast and methodically. First, stop the leak, protect the room, and document every affected area. Then inspect the ceiling, dry the structure, and remove any soaked drywall or insulation before mold starts. After that, repair the framing, patch the surface, and locate the roof failure so it doesn’t return. One hidden step often decides whether the repair lasts.
Key Takeaways
- Stop the leak, protect the area, and document all storm damage with photos and notes.
- Trace the water source, make a temporary patch, and dry the area with fans and dehumidifiers.
- Remove wet drywall and insulation back to dry material, then dispose of damaged debris safely.
- Inspect framing for rot or sagging, and add structural support if needed before repairs.
- Reinstall drywall, match texture, prime, paint, and verify the roof repair prevents future leaks.
What to Do After Ceiling Water Damage
Start by stopping the leak and protecting the area below the ceiling.
Then document every stain, sag, and drip with photos and notes; your insurance claims will need clear evidence.
Move furniture, electronics, and textiles out of the impact zone, and place buckets or plastic sheeting where water may continue to fall.
If you can do so safely, make temporary repairs to limit further intrusion, such as sealing an obvious exterior opening or covering a damaged section with a tarp.
Turn off power to wet fixtures if needed and avoid touching compromised drywall.
Next, contact your insurer and a qualified restoration pro so you can confirm next steps, reduce hidden damage, and keep your team aligned.
Acting fast helps you protect your home and restore normalcy sooner.
Stop the Leak and Protect the Room
Find the leak source first, then stop the water intrusion at the entry point, roof seam, or failed flashing.
Next, seal the damaged area with a compatible temporary patch or weatherproof sealant to limit further penetration.
After that, dry the room with fans and dehumidification to reduce secondary damage and prevent mold growth.
Locate Leak Source
Trace the leak to its highest visible point first, because water often travels before it drips. You’ll usually find the true entry point above the stain, along roof edges, window frames, wall penetrations, or pipe chases.
Use leak detection methods like a flashlight, moisture meter, and a dry paper towel to confirm active seepage. If you suspect a supply line or drain, schedule a plumbing inspection so you can rule out hidden failures fast.
Check for discoloration, swollen trim, rust, loose fasteners, and damp insulation. Mark each suspect area with painter’s tape so your team can track progress.
When you isolate the source, you protect the room, reduce confusion, and stay aligned with the rest of the repair plan.
Seal and Dry Area
Seal the opening first, then dry the affected area so the leak can’t keep feeding damage.
Apply water sealing caulk, tape, or patching compound to the intrusion point, then verify the seal with a light spray test.
Remove standing water immediately, pull back wet flooring, and run dehumidifiers and fans to reduce humidity fast.
Open cavities only as needed so hidden materials can dry without trapping moisture.
Replace saturated insulation and install temporary moisture barriers over exposed framing to protect the room while repairs cure.
Check corners, seams, and baseboards for lingering dampness, because small wet spots can restart decay.
When you do this methodically, you help your space recover faster and keep your home’s repair crew on the same page.
Inspect the Ceiling for Water Damage
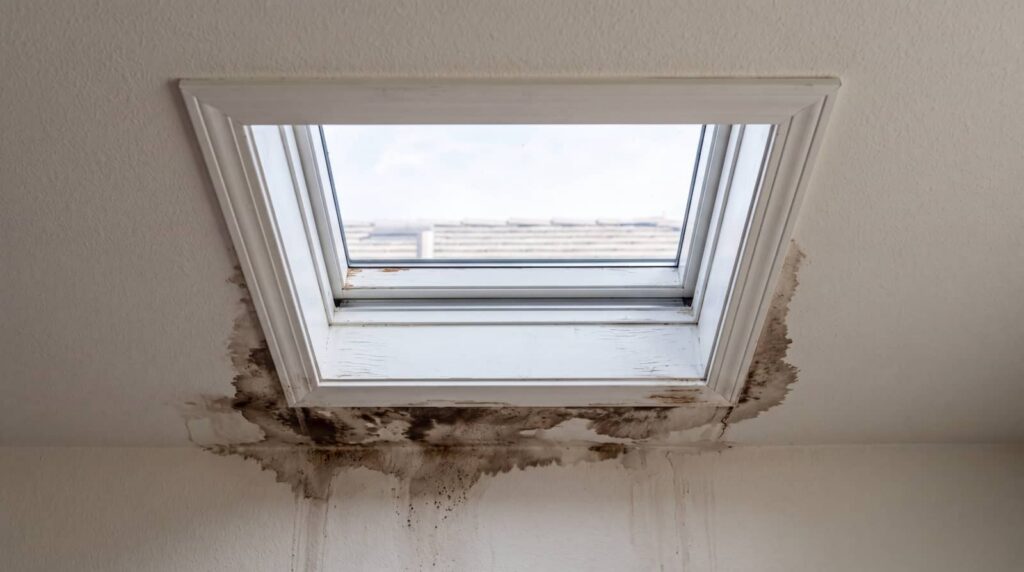
Inspect the ceiling for stains, discoloration, and water rings, since these marks pinpoint where moisture entered.
Check for sagging, soft spots, or bulging areas, which signal structural weakening and hidden saturation.
If you spot any active leaks, mark the area immediately so you can isolate the source and prevent further damage.
Locate Ceiling Stains
Start with a careful ceiling check for any discoloration, bubbling paint, sagging drywall, or brown rings, since these stains often mark the path of storm water intrusion.
Trace each ceiling stains area outward to find the widest moisture boundary, then note its shape, size, and location. Use a flashlight at an angle to reveal faint edges and map every mark on a simple sketch so you can compare changes later.
If you see multiple spots, connect them to the likely entry point above. Avoid scrubbing before you verify the source, because stain removal only works after the leak is controlled.
Mark suspect zones with painter’s tape, and keep your notes organized so your repair plan stays accurate and your team stays aligned.
Check for Sagging
After you’ve mapped the ceiling stains, check the surrounding drywall for any sagging, bowing, or soft spots that suggest trapped water above the surface.
Press gently with your hand; healthy drywall feels firm, while weakened areas give slightly and may flex under light pressure.
Scan seams, corners, and fastener lines for uneven planes, because storm impact can shift moisture outward from the original stain.
If the ceiling looks wavy or droops between joists, treat it as compromised and document the extent.
Keep the area undisturbed so you can judge the ceiling’s condition accurately and protect structural integrity.
You’re not just spotting damage; you’re confirming whether the surface still supports safe, reliable repair.
Note Active Leaks
Look closely for any active leaks by tracing damp spots on the ceiling, especially around stains, seams, vents, and light fixtures. You’ll use this leak detection step to identify the current entry point, not just the damaged area below.
Press gently near discoloration; if the surface feels cool, soft, or swollen, you likely have ongoing intrusion. During your moisture assessment, check whether the wet area expands after rainfall or when plumbing runs.
Mark each spot with painter’s tape so your repair team can map the spread quickly. If you see drips, shut off nearby water sources and protect the room with buckets and plastic sheeting.
You’re not handling this alone; accurate notes help your crew act fast, reduce loss, and restore your space safely.
Dry the Ceiling and Attic Quickly
Begin drying the ceiling and attic immediately to stop moisture from spreading and to reduce the risk of mold, insulation damage, and structural deterioration.
You can control conditions with targeted ventilation techniques and drying equipment. Create crossflow by opening access points and windows, then position fans to push humid air out. Use a dehumidifier in the attic if power is safe.
- Inspect hidden pockets of dampness.
- Aim airflow across joists and framing.
- Monitor humidity until it drops below 60%.
- Keep the area warm, not overheated.
Check for sagging or staining each few hours, and document progress. Work carefully, stay consistent, and you’ll help your home recover with less secondary damage.
Remove Wet Drywall and Insulation
Check the drywall and insulation for saturation, and mark any sections that stay soft, swollen, or damp.
Cut out the damaged drywall back to dry, stable material so you can expose the cavity for repair.
Remove all wet insulation completely, since it won’t dry effectively and can trap moisture against framing.
Assess Water Saturation
Water can hide inside wall cavities long after the surface feels dry, so you need to assess saturation before any repairs begin. Use a moisture meter on drywall, insulation, studs, and base plates, then compare readings to unaffected areas. Check the water table and soil permeability, since both influence how long stormwater keeps feeding the structure.
- Probe at several heights.
- Mark wet zones for tracking.
- Confirm hidden dampness near corners.
- Recheck after ventilation improves.
If readings stay elevated, you’re not ready for cosmetic work. Remove wet drywall and insulation only when your measurements show the cavity can dry safely and consistently.
That way, you protect the structure, reduce mold risk, and keep the repair plan aligned with your team.
Cut Out Damaged Drywall
Once saturation readings show the wall cavity can dry consistently, cut out the damaged drywall and any wet insulation so trapped moisture can’t keep feeding mold or structural decay.
You should mark clean, straight lines at least 12 inches beyond visible staining, then use a utility knife or drywall saw to remove the affected section. Work carefully around outlets and trim, and shut off power if needed.
Bag debris immediately to limit dust and spores, then inspect framing for soft spots or discoloration. Keep the opening large enough for airflow and later drywall replacement, but don’t overcut sound material.
This step supports mold prevention and gives your repair team a clean, stable edge. You’re creating the right base for the next phase.
Remove Wet Insulation
Pull out any wet insulation as soon as you open the wall, since soaked material holds moisture against the framing and slows drying. You’ll protect the cavity by working in sections and bagging debris fast.
Use these insulation removal techniques:
- Wear gloves, an N95, and eye protection.
- Score batts or cut loose blown-in material with a utility knife.
- Pull insulation straight out to avoid tearing drywall edges or spreading fibers.
- Seal waste in contractor bags and follow local materials disposal methods.
After removal, inspect studs, plates, and sheathing for discoloration or softness.
If you’re on a cleanup crew, keep the area organized so everyone can work safely and stay on the same page.
Run fans and a dehumidifier only after the cavity is clear.
How to Prevent Mold After a Ceiling Leak
To prevent mold after a ceiling leak, you need to dry the area fast and remove every wet material that can hold moisture.
Run fans and a dehumidifier until surfaces feel fully dry, and keep indoor humidity below 60%.
Check for hidden dampness around light fixtures, seams, and trim with a moisture meter.
Clean exposed surfaces with a detergent solution, then apply an EPA-registered antimicrobial if the label allows it.
As part of your mold prevention tips, inspect the ceiling weekly for stains, musty odors, or new discoloration.
Good ceiling maintenance includes fixing the leak source promptly, keeping gutters clear, and sealing gaps that let water in.
When you act quickly, you protect your home and stay part of a safer, healthier space.
Repair the Ceiling Frame and Drywall
Start by inspecting the ceiling frame for sagging, rot, or cracked joists. Then remove any damaged drywall, insulation, or fasteners that can’t be salvaged. You’ll restore safe frame support by reinforcing weak members and replacing compromised ceiling materials with code-rated boards.
Measure span deflection and mark every damaged section.
Install sistered joists or blocking where the structure has lost rigidity.
Cut replacement drywall to fit snugly, leaving clean, square edges.
Secure panels with proper screws, spacing them evenly for load transfer.
Keep each repair aligned so the ceiling stays level and stable. Work methodically, and you’ll fit right in with homeowners who value lasting fixes over quick patches.
Check every joint before you move on, because solid support now prevents costly failure later.
Match Texture, Paint, and Finish
Once the repairs are secure, you’ll need to match the existing texture, paint, and finish so the patched area blends in cleanly with the surrounding ceiling or wall.
Start with texture matching: test a small sample on scrap drywall, then recreate the pattern with the same tool, pressure, and drying time.
Next, prime the patch so the paint absorbs evenly and the repair won’t flash. Use a color-matched topcoat and feather the edges beyond the repair for a seamless shift.
Finally, compare finish types, such as flat, eggshell, or satin, and apply the closest sheen in thin, uniform coats.
Good blending helps your space feel whole again, so the repair doesn’t draw attention.
Find and Fix the Roof Leak
Before you repair the interior damage, you need to stop the source, so inspect the roof for missing shingles, cracked flashing, damaged vents, clogged valleys, or loose fasteners.
Use a roof inspection on a dry day, and move methodically so your leak detection stays accurate. Check from the attic first; look for daylight, wet insulation, or staining that points to the entry path.
Then work outside and mark each suspect area.
- Replace missing or split shingles.
- Seal flashing gaps with compatible roofing cement.
- Clear debris from valleys and drain paths.
- Tighten or replace loose hardware.
After each fix, hose the area briefly and confirm no water enters.
When you verify the repair, you protect your home and join the neighbors who act fast and stay prepared.
When to Call a Water Damage Pro
If the leak has soaked insulation, spread into walls or ceilings, or left you with sagging drywall, mold growth, or electrical concerns, call a water damage pro right away.
You can’t safely dry hidden cavities or verify structural integrity without specialized tools. A qualified team will perform a water damage assessment, measure moisture levels, identify contaminated materials, and map the affected zone.
That gives you a clear scope and helps prevent secondary damage. When water has reached framing, flooring underlayment, or HVAC components, professional restoration becomes the fastest path to recovery.
You’ll get extraction, controlled drying, sanitizing, and documentation for insurance. If you’re unsure, trust the signs and act early.
You belong in a dry, stable home, and prompt help protects it.
Frequently Asked Questions
How Can I Document Storm Damage for Insurance Claims?
You can document storm damage by photographing every affected area, noting dates, collecting receipts, and recording a damage assessment. Submit clear evidence through the claim process, so you’re supported, informed, and ready.
Should I Move Furniture Before Inspecting Water Damage?
Yes, you should move furniture if you can do it safely. Prioritize furniture protection with blocks or plastic, then inspect quickly—inspection timing matters because trapped moisture can spread damage and hide structural problems.
Can Storm Water Damage Affect Electrical Outlets?
Yes—storm water damage can affect your electrical outlets. You should shut off power, prioritize electrical safety, and schedule outlet inspection immediately. Moisture can corrode contacts, trigger shorts, and create shock risks in your home.
How Do I Tell Storm Damage From a Plumbing Leak?
Check ceilings, walls, and floors: storm impact usually stains broad, wind-driven areas, while a plumbing leak stays localized and steady. Use leak detection tools, trace moisture paths, and compare damage patterns to pinpoint the source.
What Safety Gear Should I Wear After Flooding?
You should wear flood safety protective equipment: waterproof boots, gloves, eye protection, and an N95 respirator. If water’s contaminated, add coveralls and a hard hat. You’ll protect yourself and fit right in.
Final Thoughts
If you act fast, you can limit stormwater damage before it spreads. Remember, the EPA says indoor humidity above 60% can support mold growth, so keep the area dry and ventilated. After you stop the leak, remove damaged materials, repair the framing, and seal everything waterproof before finishing. If you still see staining, sagging, or dampness, call a water damage pro right away to prevent hidden structural and mold problems.
Recent Posts
What Is Water Restoration After Pipe Damage?
After pipe damage, you need water restoration to stop further loss and return the property
24-Hour Water Damage Cleanup Guide
When water hits your property, you have a narrow window to limit the damage and
24/7 Water Damage Cleanup Checklist
At 2 a.m., you notice water pooling under your laundry room wall, and you have