
Contents
Water after a leak can act like a silent fuse, setting mold growth in motion before you notice the damage. You need to inspect affected areas quickly because moisture can enter wall cavities, insulation, and ceiling materials, where it may support hidden growth within 24 to 48 hours. Testing can confirm contamination, reveal affected materials, and guide timely remediation before structural damage and health risks increase.
Key Takeaways
- Mold can begin growing within 24 to 48 hours after water damage, so early inspection is critical.
- Hidden moisture in walls, flooring, insulation, and cavities can fuel unseen mold growth.
- Inspection helps detect active mold, airborne spores, and elevated moisture before damage spreads.
- Timely testing protects indoor air quality and reduces health risks for occupants.
- Early identification allows faster remediation, limiting structural damage and lowering repair costs.
Why Inspect Mold After Water Damage
After water damage, you should inspect for mold because moisture can support growth within 24 to 48 hours, especially in hidden areas such as wall cavities, flooring, and insulation.
You protect mold health by checking damp materials before colonies spread and degrade indoor air quality. You can limit structural loss and reduce remediation costs when you act quickly.
Your team should verify that all wet surfaces, porous contents, and concealed spaces are dry or removed. Use prevention strategies that include rapid drying, ventilation, and repair of the moisture source.
If you share a home or workplace, prompt inspection helps everyone stay informed and supported. Quick action doesn’t just preserve materials; it also lowers exposure risk and keeps your environment safer for the people who count on it.
Signs You Need Mold Testing
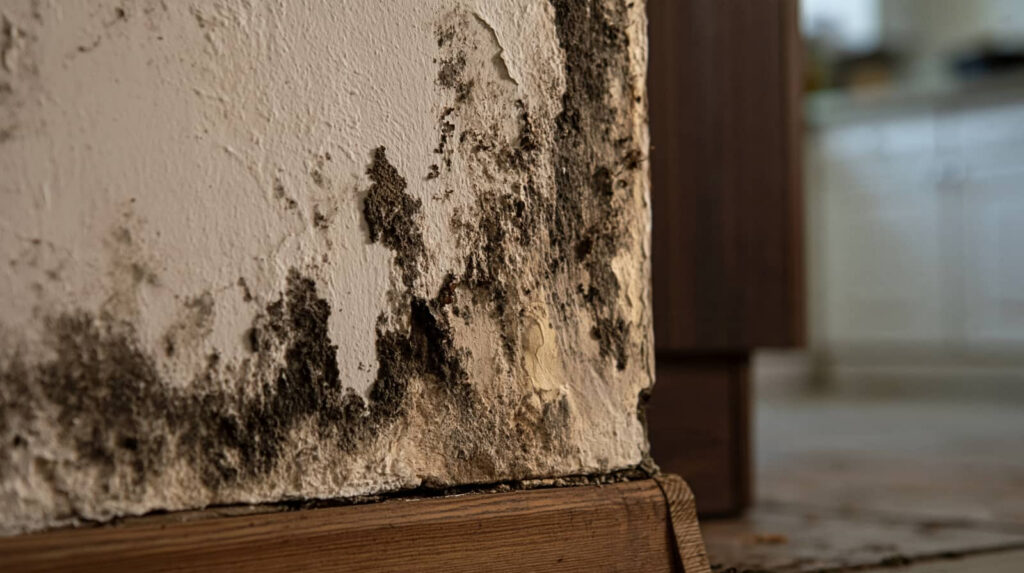
You should schedule mold testing if you see visible mold growth after water damage, since surface growth often indicates hidden contamination.
Persistent musty odors can also signal active microbial growth even when you can’t see it.
Recurring moisture stains suggest ongoing dampness, which increases the likelihood that mold is present and expanding.
Visible Mold Growth
Visible mold growth often indicates that moisture has remained in building materials long enough for fungal colonization to occur. You should treat any visible patch as a sign that you need mold testing, because surface color and texture can’t confirm the mold types present.
Testing helps you identify whether the growth involves common indoor species or more concerning contamination patterns. You also gain a clearer estimate of health risks, especially if the affected area sits near ventilation paths, bedrooms, or shared living spaces.
When you document the location, size, and spread, you support a more accurate inspection and remediation plan. If you’re part of a household or facility team, prompt testing helps everyone stay informed, coordinated, and confident about the next steps.
Persistent Musty Odors
Persistent musty odors often indicate hidden moisture that has allowed mold to grow in cavities, behind finishes, or inside HVAC components. You may not see the source, but you can still detect airborne mold spores and related microbial byproducts that signal contamination.
If the smell intensifies after rain, cooling cycles, or ventilation use, your space likely has elevated indoor humidity supporting growth. You shouldn’t rely on air fresheners or surface cleaning to resolve it, because they only mask the condition.
Instead, arrange mold testing to confirm whether the odor reflects active amplification or lingering residue from prior water damage. Early assessment helps you protect your home, maintain shared indoor air quality, and stay aligned with a community that values safe, healthy living conditions.
Recurring Moisture Stains
Recurring stains that reappear after cleaning or drying often indicate an ongoing moisture source behind walls, under flooring, or above ceilings. You should treat these marks as evidence, not cosmetic flaws.
Inconsistent stain patterns, ring edges, and localized discoloration help with stain identification and point to leaks, condensation, or trapped water. When you document the same area changing color again, you’re seeing conditions that can support mold growth.
Test promptly if stains return after HVAC use, rain, or plumbing activity. By acting early, you protect your home and stay aligned with a community of owners who address damage methodically.
A qualified inspector can trace moisture sources, verify hidden saturation, and determine whether mold testing is needed.
Where Mold Hides After Ceiling Leaks
After a ceiling leak, you should inspect attic insulation because it can trap moisture and conceal visible mold growth.
You should also check wall cavities, where water can migrate and remain hidden behind drywall. These enclosed spaces often hold damp materials long after the leak stops.
Attic Insulation
Attic insulation can trap moisture from ceiling leaks, creating a hidden environment where mold can spread unnoticed. You should inspect the full depth of the insulation, not just the surface, because damp fibers can stay wet after the visible stain dries.
Check around roof penetrations, light fixtures, and the leak path for discoloration, odor, and clumping. Good attic ventilation helps reduce humidity, but it won’t remove water already absorbed by insulation materials.
If you find wet cellulose, fiberglass, or mineral wool, you need to document the area and arrange prompt drying or removal. You’re protecting both air quality and the home’s structure when you act early.
Clear, targeted inspection keeps your team aligned and helps prevent a small leak from becoming a larger mold problem.
Wall Cavities
Wall cavities can conceal mold growth long after a ceiling leak appears dry, especially when water runs down framing or wicks into drywall and insulation.
You should inspect these enclosed spaces because hidden moisture often persists behind paint, baseboards, and trim. Moist wall insulation can trap dampness against studs, creating conditions that support fungal growth and material decay.
Use a moisture meter, thermal imaging, or targeted removal of drywall to verify dry conditions. You’ll protect your home and stay aligned with others who value clean, healthy structures when you check for staining, odor, and softened materials.
If you find mold, document the affected area, correct the leak source, and dry the cavity thoroughly before repairs.
How Burst Pipes Spread Mold Fast
When a pipe bursts, it releases a large volume of water into building materials, and that moisture can trigger mold growth in as little as 24 to 48 hours. In burst pipe scenarios, water moves through drywall, insulation, and framing, creating hidden reservoirs that support rapid mold spread.
You’ll see the greatest risk in enclosed areas where airflow is limited and surfaces stay damp. Because mold colonies can form in connected cavities, one failure can affect multiple rooms and shared systems.
- Porous materials absorb water quickly.
- Warm, stagnant zones accelerate colonization.
- Hidden wetting delays visual detection.
You belong in a response plan that treats every rupture as a contamination event. Prompt inspection helps you identify spread patterns, map affected materials, and reduce secondary damage before colonies mature.
Why Water Must Be Removed Within 24 Hours
If you leave standing water in place, moisture begins migrating into drywall, wood, insulation, and subfloors almost immediately. You need water removal within 24 hours because porous materials absorb liquid fast, and saturation changes their structural and drying behavior.
After that window, moisture control becomes harder, surface drying won’t reach hidden layers, and your building can stay damp longer than you expect. You’re not overreacting by acting quickly; you’re protecting the shared spaces that matter to you and the people who rely on them.
Prompt extraction also limits warping, swelling, and loss of material integrity. When you move fast, you give your property a better chance to dry uniformly, return to service sooner, and avoid avoidable complications from prolonged wet conditions.
What Mold Testing Reveals in Wet Materials
Mold testing in wet materials shows how far moisture has penetrated and whether growth is already developing inside drywall, insulation, wood, or subflooring.
You can use testing methods to identify hidden contamination that visual checks miss, helping you decide whether your space still feels safe and connected. Results often indicate elevated moisture, active colonization, or dormant spores waiting for conditions to improve.
Lab analysis can also distinguish mold species, which matters because different organisms signal different exposure patterns and material damage.
- Pinpoints concealed wet zones
- Confirms whether growth is active
- Identifies mold species for accurate risk assessment
With this data, you’re better equipped to understand the extent of impact and trust the findings guiding your next move.
Steps in a Mold Inspection After Water Damage
After water damage, a proper mold inspection starts with mapping the moisture source, then checking affected materials for visible staining, warping, and odor.
You then document room conditions, measure humidity, and trace hidden wet zones behind finishes.
Next, use inspection techniques to compare surfaces, test suspect areas, and confirm whether mold growth is active or dormant.
You should inspect joints, insulation, subfloors, and HVAC return paths because these areas often retain moisture.
Record findings with photos, notes, and moisture readings so your team can align on scope and priorities.
If levels remain elevated, repeat checks after drying to verify that conditions have stabilized.
This method gives you clear, objective data and helps your community respond consistently and confidently.
Restoring a Ceiling After Mold Damage
Once inspection confirms ceiling materials stayed wet long enough for fungal growth, you can begin planning restoration by separating salvageable components from those that need removal.
You should treat ceiling restoration as a controlled sequence, not a guess. Remove contaminated drywall, insulation, and trim in sections, then clean framing to support mold remediation. Use containment, negative pressure, and personal protective equipment to limit spread and protect everyone on your team.
- Discard porous materials that show visible growth or saturation.
- HEPA-vacuum and wipe nonporous framing surfaces.
- Verify moisture levels before closing the assembly.
After cleaning, you can replace materials, tape joints, and finish the surface to match adjacent areas.
Careful documentation helps you stay aligned with your crew and with the repair scope.
How to Prevent Mold After Storm Damage
To prevent mold after storm damage, you need to dry the structure fast, remove wet porous materials, and control indoor humidity before spores can colonize.
You should ventilate enclosed spaces, run dehumidifiers, and monitor moisture with meters until readings stabilize.
Use storm preparedness tips before severe weather: seal gaps, elevate valuables, and document materials that may need replacement.
After impact, inspect insulation, drywall, carpeting, and subfloors within 24 to 48 hours.
If contamination appears, isolate the area and clean hard surfaces with approved antimicrobial products.
Replace damaged items that can’t be fully dried.
Apply moisture control methods consistently so your home stays safe, healthy, and ready for your household to return with confidence.
Frequently Asked Questions
What Health Symptoms Can Mold Exposure Cause?
You can experience mold allergies, respiratory issues, skin irritations, chronic fatigue, and neurological symptoms after exposure. You’ll often notice coughing, wheezing, headaches, and rashes, especially if you’re sensitive, immune-compromised, or in enclosed spaces.
How Long Does Mold Take to Grow After Water Damage?
Mold can start growing within 24 to 48 hours after water damage, depending on water damage factors. You’ll see faster mold growth timeline in warm, humid, poorly ventilated spaces, so act quickly.
Can Hidden Mold Spread Without Visible Stains?
Yes—hidden mold can spread without visible stains, and you may not notice until the hidden risks intensify. If you don’t maintain moisture control, spores can move through cavities, affecting your space before you see damage.
Is DIY Mold Testing Accurate Enough for Homeowners?
DIY kits can help you screen, but their testing accuracy varies, so you shouldn’t rely on them alone for mold identification. You can reduce homeowner concerns by confirming results with a qualified inspector.
Does Homeowners Insurance Cover Mold Remediation Costs?
You usually don’t get full mold remediation coverage; your insurance policy specifics decide. Inspect exclusions, sudden-loss clauses, and mold prevention strategies. Like a damp shadow creeping behind walls, mold costs can surface fast after water incidents.
Final Thoughts
After water damage, you should inspect for mold because moisture acts like a key that opens hidden growth within 24 to 48 hours. You may not see it, but it can spread through wall cavities, insulation, and ceiling materials like a silent stain on the structure’s integrity. When you test early and remove water fast, you limit damage, protect indoor air quality, and keep small leaks from becoming costly, long-term remediation projects.
Recent Posts
What Ceiling Leak Mold Testing Reveals
A ceiling stain often tells you less about visible water and more about hidden moisture
7 Tips for Leak Mold Testing
After a ceiling leak leaves a brown stain above your hallway, you need to start
24-Hour Pipe Leak Water Cleanup
When a pipe leaks, every minute counts because water can spread into walls, floors, and