
Contents
When a burst leak hits, you need to act fast and stay methodical. You’ll shut off the water, protect nearby rooms, and start removing standing water before damage spreads. Then you’ll dry ceilings, walls, and floors with the right tools, while checking for hidden moisture and mold risk. The next steps can determine whether you’re facing a simple repair or a full restoration.
Key Takeaways
- Shut off the main water supply immediately to stop flooding and reduce damage.
- Move valuables, protect electrical areas, and document the leak for insurance claims.
- Remove standing water quickly using pumps, wet vacuums, towels, fans, and dehumidifiers.
- Dry, sanitize, and inspect walls, ceilings, flooring, and hidden moisture to prevent mold.
- Arrange professional plumbing, restoration, and mold inspection if damage is extensive or unsafe.
What to Do After a Burst Leak
If a pipe bursts, shut off the main water supply right away to stop the flow and limit damage.
Next, call your emergency contacts so you’re not handling the situation alone, and alert your plumber, landlord, or property manager.
Document the leak with photos and brief notes; this helps you stay organized and supports insurance claims.
Move quickly to a safe area, check for electrical hazards if water is near outlets or appliances, and keep everyone away from the affected zone.
You can also clear a path for responders and gather towels, buckets, and important papers.
Stay calm, follow each step methodically, and remember you’re part of a community that looks out for one another during a burst leak.
Stop the Water and Protect Nearby Rooms
Shut off the main water valve immediately to stop the flow at its source.
Move valuables, electronics, and loose materials away from the affected area, then place towels or barriers to block water from spreading into nearby rooms.
These steps limit damage and give you a controlled workspace for cleanup.
Shut Off Main Valve
Move quickly to stop the flow at the main water valve so you can limit damage and protect nearby rooms. You’ll usually find the valve near the water meter, foundation wall, or where the service line enters.
Check the valve location first, then turn it clockwise until it stops. Different main valve types—gate, ball, or curb stop—need slightly different effort, but each should shut down the supply cleanly.
If a handle resists, don’t force it; steady pressure works better and protects the fitting. After closure, open a nearby faucet to relieve line pressure and confirm the water has stopped.
Keep calm, work methodically, and trust your process. You’re handling the critical first step that helps everyone in the home stay safer.
Move Valuables Away
With the main supply off, start clearing the area around the burst so water can’t reach items that matter. You’re not alone in this step; a calm, organized response protects your space and keeps recovery manageable.
Focus on valuable protection and furniture relocation with a steady pace.
- Lift electronics, documents, and decor onto dry shelves or upper counters.
- Move chairs, rugs, and small tables out of splash range.
- Place wood furniture on blocks or towels to reduce contact with damp floors.
- Carry fragile items to a nearby dry room and label them for quick return.
Check each corner for hidden valuables, then keep paths open for safe movement. By acting methodically, you reduce damage and help nearby rooms stay ready for cleanup.
Block Water Spread
After you’ve cleared valuables, you can slow the damage by containing the water at the source and around the burst. Shut off the main supply, then close nearby fixture valves if you can reach them safely.
Place towels, bath mats, or sandbags in a tight line to create water barriers at doorways and floor junctions. Use a wet vacuum or mop to pull standing water back toward the leak, not into adjoining rooms.
If the burst is near cabinets or a hallway, block gaps with rolled towels and plastic sheeting for stronger flood prevention. Keep children and pets out of the area, and check the space every few minutes.
You’re not alone here; these steps help you protect your home methodically until repairs begin.
Clean Up Burst Leak Damage
Once you’ve stopped the water flow, you should remove standing water and begin drying all affected surfaces right away.
Use fans, dehumidifiers, and absorbent materials to reduce moisture before it spreads into walls, floors, and insulation.
After the area is dry, sanitize it to limit contamination and help prevent mold growth.
Stop The Water Flow
Shut off the main water supply immediately to stop the leak from feeding more damage. If you’re in the affected space, you’re doing the right thing by acting fast and staying methodical.
Check the meter and isolate fixtures to confirm the flow’s gone; this helps with water pressure control and quick leak detection. Your cleanup team can then work safely and confidently.
- Turn the main valve clockwise until it stops.
- Open a lower faucet to relieve residual pressure.
- Shut off branch valves to protect nearby lines.
- Verify no water is moving through the meter.
Stay calm—you’re not handling this alone. Once the water stops, you’ve created the safest starting point for the rest of the cleanup process.
Dry And Sanitize Quickly
With the water source isolated, move straight into drying and sanitizing the affected area to limit structural damage and mold growth.
You’ll want to remove standing water, then use towels, wet vacuums, fans, and dehumidifiers for rapid drying. Open cabinets, lift rugs, and expose hidden cavities so air can circulate.
Check drywall, baseboards, and flooring for trapped moisture, because moisture control starts with finding every damp surface. Clean hard surfaces with an appropriate disinfectant, following label contact times to sanitize thoroughly.
Wear gloves and eye protection, and replace porous materials that stayed wet too long. Track humidity and temperature as you work, and keep the area isolated until readings normalize.
You’re not handling this alone; steady, methodical cleanup protects your space and your people.
Dry Ceilings and Walls Fast
Before you do anything else, stop the spread of moisture and get air moving through the room so ceilings and walls can dry as quickly as possible. You’re not alone here; this process is straightforward when you work methodically.
Run ceiling fans to keep surface air moving, but don’t point them at loose material.
Set up a dehumidifier and monitor dehumidifier usage so humidity stays low and evaporation speeds up.
Open interior doors and lift cabinet doors to expose trapped damp zones.
Check insulation, trim, and drywall edges daily; dry any cool, soft, or darkened areas with towels and airflow.
Keep power off near wet fixtures, and stay alert for lingering moisture. With steady airflow and low humidity, you’ll give your walls and ceilings the best chance to dry cleanly.
When You Need a Mold Inspection
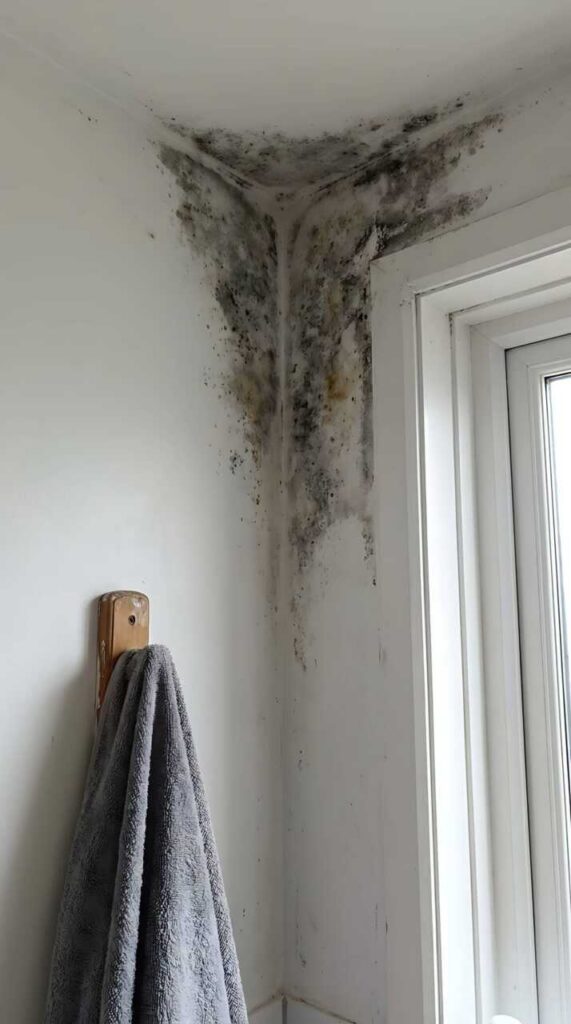
If you still smell a musty odor, see visible growth, or notice drywall, insulation, or trim staying damp after 24 to 48 hours, you should schedule a mold inspection.
A qualified inspector can identify moisture sources, measure humidity, and determine which mold types may be present. You’ll get a clear report that helps you act before contamination spreads through shared rooms and occupied areas.
If the leak was large, hidden, or repeated, don’t wait for symptoms to appear. Your inspection frequency should increase after any burst pipe, roof intrusion, or prolonged dampness, especially in warm, enclosed spaces.
Restore Walls, Ceilings, and Finishes
Once the structure is dry and the inspection confirms the area is safe, you can start restoring walls, ceilings, and finishes in a controlled order. You’ll protect your space and your team by sequencing work carefully:
Remove damaged drywall, trim, and insulation.
Complete wall restoration with matching board, tape, mud, and sanding.
Perform ceiling repair by replacing sagging sections and sealing joints.
Prime, repaint, and reinstall finishes after moisture readings stay stable.
Check framing for hidden warping, then verify fasteners, seams, and texture before closure.
If you keep the area ventilated and monitor humidity, you’ll prevent new defects.
You’re not just repairing surfaces; you’re bringing the room back to a clean, familiar state where everyone can feel at home again.
Frequently Asked Questions
What Should I Document for My Insurance Claim?
Document damage, date, time, cause, affected areas, cleanup steps, and emergency contacts. Take clear photos, save receipts, and note the claim process. These documentation tips help you feel supported and keep your claim organized.
How Do I Find Hidden Leak Sources?
You’ll trace hidden leaks like a detective follows footprints: start with leak detection tools, then perform moisture mapping across walls, floors, and ceilings. You can’t see every source, but you’ll narrow it methodically, safely, and confidently.
Should I Call a Plumber Before Cleanup Starts?
Yes, you should call a plumber before cleanup starts. You’ll speed emergency response, limit damage, and support leak prevention. Shut off water, document the area, and wait for guidance so you don’t miss hidden hazards.
Can I Safely Use Electrical Outlets After Flooding?
No, you shouldn’t use flooded outlets. After a basement flood, one homeowner waited for outlet inspection, then restored power safely. You’ll protect electrical safety by shutting off breakers and calling a licensed electrician first.
How Long Does Water Damage Claim Approval Take?
Water damage claim approval usually takes days to weeks, depending on claim processing and your insurance response. You’ll speed it up by documenting damage, submitting promptly, and staying in contact with your adjuster.
Review
When you face a burst leak, act fast: shut off the water, protect nearby rooms, remove standing water, and dry ceilings and walls immediately. Inspect for mold if moisture lingers or odors develop. Then restore damaged finishes methodically so the space is safe again. You’ve heard it said that time is money, and that’s especially true here. With prompt, careful cleanup, you can limit damage, reduce repair costs, and get your home back to normal.
Recent Posts
24/7 Water Damage Cleanup Checklist
At 2 a.m., you notice water pooling under your laundry room wall, and you have
What Is 24 Hour Water Damage Cleanup?
If you’re dealing with a water emergency, 24 hour water damage cleanup gives you immediate
Ceiling Leak Mold Inspection Report Guide
If you’re dealing with a ceiling leak, you need to know how mold can develop,