Contents
Black mold can pose serious health risks and often stems from water damage that’s been left unchecked. It’s vital to address this problem systematically to ensure a safe environment. By following a structured approach, you can effectively eliminate mold and prevent its return. But what are the specific steps you need to take to tackle this issue head-on? Let’s explore the essential actions required for effective mold removal.
Key Takeaways
- Inspect affected areas for visible mold growth and document findings, including size and potential water sources contributing to the problem.
- Equip yourself with high-quality safety gear like respirators, gloves, and disposable coveralls to protect against mold exposure.
- Seal off the contaminated area with plastic sheeting to contain spores and create negative air pressure for safe removal.
- Remove and properly dispose of all contaminated materials, sealing them in plastic bags to prevent further contamination.
- Clean and disinfect surfaces thoroughly using effective agents, while monitoring humidity levels to prevent mold recurrence.
Assess the Extent of the Mold Problem
Before you tackle the removal of black mold, it’s essential to assess the extent of the mold problem.
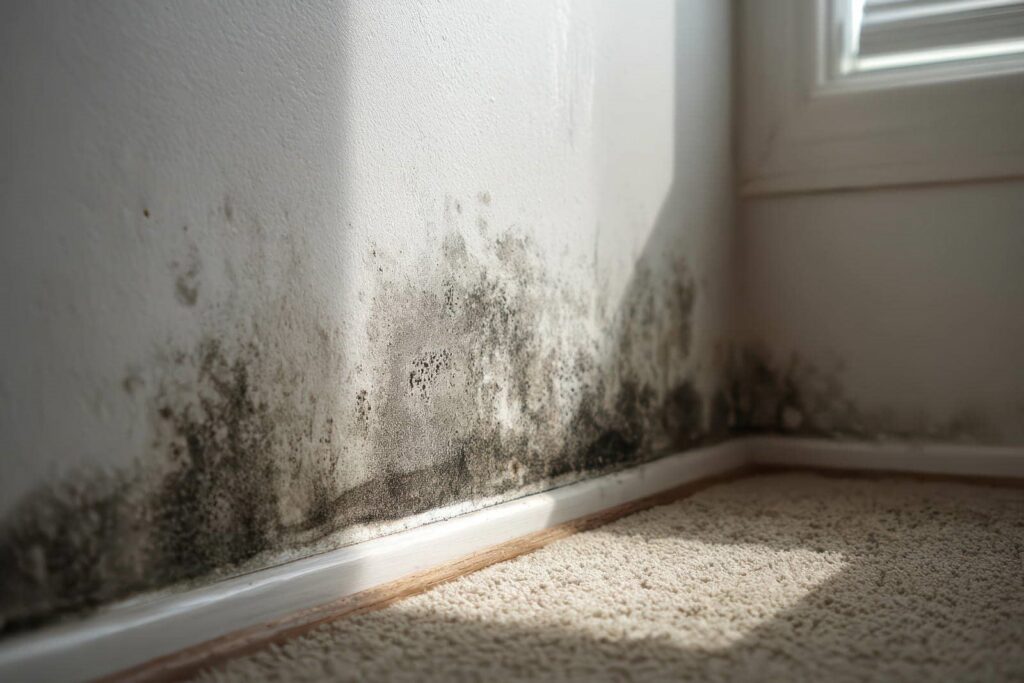
Start by inspecting all affected areas, especially those with previous water damage. Look for visible mold growth on surfaces, which can vary in color and texture. Use your senses; a musty odor often indicates hidden mold.
Evaluate the size of the affected area—if it’s larger than ten square feet, you may need professional help.
Consider the potential health risks associated with exposure to mold, such as respiratory issues and allergic reactions.
Document your findings, noting any water sources contributing to the problem, as this will help in planning your remediation efforts.
Keep in mind that understanding the severity of the mold situation is vital; it directly influences the removal process and your safety during the cleanup.
Gather Necessary Safety Gear
Once you’ve assessed the extent of the mold problem, it’s time to focus on safety.
Before you tackle the removal process, gather the necessary safety gear to protect yourself and those around you. Start by investing in high-quality safety equipment, including a respirator mask with a P100 filter. This mask will help you avoid inhaling mold spores that can be harmful to your health.
Next, don protective clothing such as long sleeves, gloves, and goggles. These items create a barrier between your skin and any mold, reducing the risk of irritation or allergic reactions.
Additionally, consider using disposable coveralls for full-body protection, ensuring you won’t track mold spores throughout your home.
Contain the Affected Area
To effectively manage the spread of black mold, you need to contain the affected area promptly.
Applying the right mold containment strategies is essential to prevent further contamination. Here are three effective seal-off techniques you can use:
Seal Off the Area: Use plastic sheeting to cover doorways, vents, and windows. This creates a barrier that minimizes air movement and keeps spores from traveling to other parts of your home.
Create Negative Air Pressure: If possible, use a fan to exhaust air from the affected area to the outside. This helps to pull air from other areas into the contaminated space, further containing the mold.
Limit Foot Traffic: Restrict access to the affected area. The less movement you have, the fewer spores will spread, making it easier to manage the cleanup process.
Remove Contaminated Materials
To effectively remove black mold, you first need to identify all affected materials, such as drywall, insulation, and carpeting.
Once you’ve pinpointed these areas, you’ll have to dispose of them properly to prevent further contamination.
Following the correct disposal methods ensures that mold spores don’t spread, keeping your environment safer.
Identify Affected Areas
Identifying affected areas is essential for effectively removing black mold after water damage.
You’ll want to utilize mold identification techniques and visual inspection methods to locate the problem spots accurately.
Here are three key steps to help you pinpoint affected areas:
Conduct a Visual Inspection: Look for discoloration or stains on walls, ceilings, and floors, as they often indicate mold growth.
Check for Water Damage: Examine areas near leaks, such as around windows, pipes, and roofs, where moisture accumulation is common.
Smell for Mustiness: A strong, musty odor often accompanies mold growth, so trust your senses when investigating.
Proper Disposal Methods
Once you’ve identified contaminated materials, it’s important to dispose of them properly to prevent further mold growth and ensure safety.
Begin by sealing affected items in plastic bags to minimize spore spread. For porous materials like drywall and carpet, safe disposal is vital; these items often can’t be salvaged.
Check local regulations for disposal guidelines, as some areas may have specific requirements for hazardous waste.
Explore recycling options where possible, especially for non-porous materials like metals and plastics, as this reduces environmental impact.
Always wear protective gear during disposal to safeguard yourself from exposure.
Clean and Disinfect Surfaces
Cleaning and disinfecting surfaces affected by black mold is essential for preventing further growth and ensuring a safe environment.
You’ll want to use effective cleaning techniques and appropriate disinfecting agents to eliminate any remaining spores. Here are three key steps to follow:
Prepare the Area: Ensure proper ventilation by opening windows and wearing protective gear like gloves and masks.
Choose Disinfecting Agents: Opt for solutions like hydrogen peroxide, vinegar, or commercial mold removers that can kill mold spores effectively.
Scrub and Rinse: Use a scrub brush or sponge to apply the cleaning solution, focusing on all affected areas.
Rinse thoroughly with water and dry the surfaces completely.
Dry the Area Thoroughly
To effectively combat black mold, drying the area thoroughly is essential, as moisture is the primary catalyst for mold growth. Start by removing any standing water using a wet/dry vacuum or towels.
Next, implement effective ventilation techniques. Open windows to promote airflow, and use fans to circulate air throughout the affected space. This step is vital for moisture control, as it hastens the drying process and limits mold’s potential resurgence.
Consider utilizing dehumidifiers to lower humidity levels, especially in enclosed areas. Monitor moisture levels with a hygrometer, aiming for a humidity level below 60%.
Pay particular attention to hidden spaces, like behind walls and under flooring, where water can linger undetected. By ensuring thorough drying, you eliminate existing moisture and create an environment that’s less conducive to mold growth in the future, fostering a healthier living space for you and your loved ones.
Monitor for Recurrence
Although you’ve taken steps to remove black mold, vigilance is vital to prevent its return.
Regular monitoring is significant to ensure that mold doesn’t recur. Implementing effective mold prevention strategies and moisture control techniques will help maintain a healthy environment.
Here are three key actions you should take:
Inspect Regularly: Check areas prone to moisture, like bathrooms and basements, for signs of mold or dampness at least once a month.
Maintain Humidity Levels: Keep indoor humidity below 60% using dehumidifiers or air conditioning, especially in humid seasons.
Address Leaks Promptly: Fix any plumbing or roofing leaks immediately to prevent moisture accumulation, which can foster mold growth.
Frequently Asked Questions
Can I Use Bleach to Kill Black Mold Effectively?
You can use bleach for mold removal, but its effectiveness is limited. While it kills surface mold, it doesn’t penetrate porous materials, allowing mold to regrow. Consider alternative solutions for a more thorough approach.
How Long Does It Take for Mold to Grow After Water Damage?
Mold can start to grow within 24 to 48 hours after water damage, depending on factors like humidity and temperature. Understanding this mold growth timeline helps you act quickly to protect your space and health.
Is It Safe to Stay in the House During Mold Removal?
It’s generally not safe to stay in your home during mold removal. Prioritize mold safety by evacuating and following home precautions. This ensures you’re protected from harmful spores while professionals handle the cleanup effectively.
What Are the Health Risks Associated With Black Mold Exposure?
Black mold exposure can feel like a bad horror movie, with serious health effects like respiratory issues, headaches, and fatigue. You might experience mold symptoms such as sneezing, coughing, and skin irritation, which shouldn’t be ignored.
When Should I Hire a Professional Mold Remediation Service?
You should hire a professional mold remediation service if mold inspection reveals extensive growth or if you notice health symptoms. Their expertise can prevent higher remediation costs and ensure safe, thorough removal for your peace of mind.
Final Thoughts
Effectively removing black mold after water damage is essential for your health and safety. By following these seven steps—assessing the situation, using safety gear, containing the area, removing contaminated materials, cleaning, drying thoroughly, and monitoring—you can greatly reduce the risk of mold recurrence. Stay vigilant, maintain proper humidity levels, and protect your environment from the harmful effects of mold.
Recent Posts
3 Tips for Navigating Mold Remediation Claims
Steering through mold remediation claims can be tricky, especially when you’re dealing with the stress
Mold Remediation Claim Assistance: Your How-To Guide
Picture a damp corner of your home, shadows of mold creeping along the walls, threatening
How to Navigate Flood Cleanup Insurance Claims
Steering through flood cleanup insurance claims can feel like trying to solve a Rubik’s Cube