Contents
Just as a skilled surgeon meticulously prepares for an operation, you must approach mold remediation with precision and care. Understanding the top steps involved is essential for effective and safe removal. From evaluating the mold situation to establishing containment, each phase requires attention to detail. What techniques and strategies do you need to implement to ensure a successful outcome? The answer lies in the steps that follow.
Key Takeaways
- Conduct thorough assessments to identify mold presence, moisture sources, and affected materials, documenting all findings for remediation planning.
- Establish containment by sealing affected areas with plastic sheeting and using negative air pressure to prevent mold spores from spreading.
- Remove moisture sources and maintain indoor humidity below 60% using dehumidifiers and improved ventilation to inhibit mold growth.
- Physically remove mold with scrubbing, HEPA vacuuming, and appropriate cleaners, while disposing of unsalvageable materials to prevent recurrence.
- Apply mold-resistant paints and sealants, and conduct final inspections with air and surface testing to ensure thorough remediation and long-term prevention.
Assessing the Mold Situation
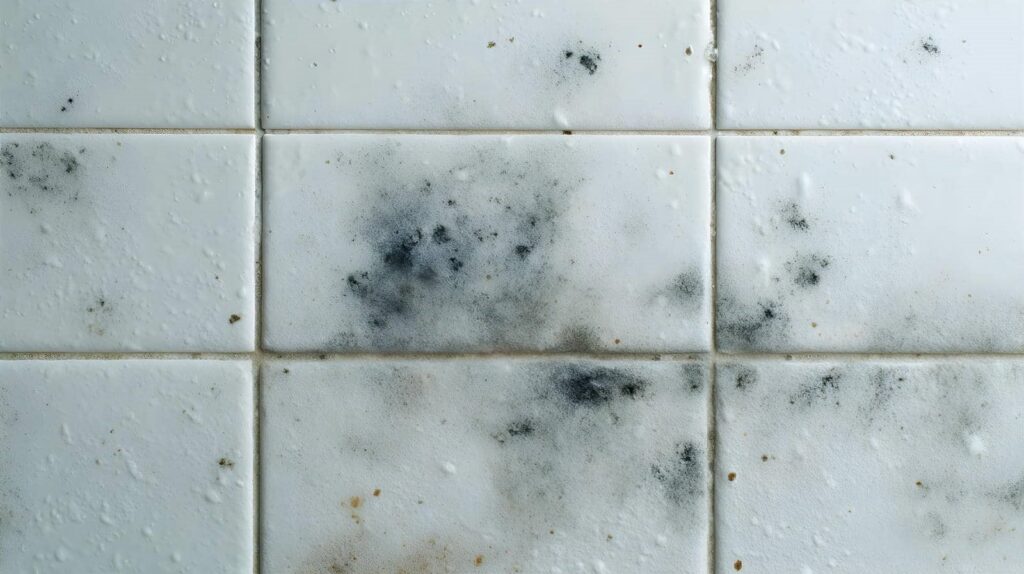
Before you begin any mold remediation efforts, it’s imperative to assess the mold situation thoroughly. Start by employing effective mold identification techniques to determine the type and extent of mold present.
Visual inspections are essential; look for discoloration, water damage, or a musty odor. Utilize moisture meters and air quality tests to gather data on humidity levels and airborne spores. Understanding the specific mold species is crucial, as some can pose serious health risks and have a greater environmental impact.
Document your findings meticulously, noting affected areas and any contributing factors like leaks or poor ventilation. This thorough assessment will guide your remediation efforts, help you communicate effectively with professionals, and ensure everyone involved feels informed and supported.
Establishing Containment
To effectively establish containment, you need to seal off affected areas to prevent mold spores from spreading.
Use proper barrier materials, such as polyethylene sheeting, to create a secure boundary around the contaminated zone.
This step is essential in ensuring a controlled environment for safe remediation.
Seal Off Affected Areas
Establishing containment is essential for effective mold remediation, as it prevents the spread of spores to unaffected areas.
To seal off affected areas, you should take the following steps:
Use plastic sheeting to cover doors, windows, and vents.
Create a negative air pressure environment to keep mold spores contained and improve air quality.
Seal gaps and cracks around windows and doors to minimize airflow.
Use Proper Barrier Materials
After sealing off affected areas, selecting the right barrier materials is essential for maintaining containment during mold remediation.
You should opt for high-quality plastic sheeting, typically six mil or thicker, to create an effective barrier against mold spores. Make sure to use adhesive tape specifically designed for sealing joints, ensuring airtight connections.
Employ proper installation techniques, such as overlapping seams and extending the sheeting beyond the affected area, to enhance containment. Don’t forget to seal off any HVAC vents or openings to prevent cross-contamination.
Personal Protective Equipment (PPE)
When tackling mold remediation, wearing appropriate personal protective equipment (PPE) is essential for your safety.
You’ll need to understand the various types of PPE available, from respirators to gloves, and how each one protects you from exposure.
Proper usage ensures that you effectively minimize health risks while handling mold-contaminated materials.
Importance of PPE
While tackling mold remediation, understanding the importance of Personal Protective Equipment (PPE) can’t be overstated.
Compliance with PPE regulations is vital for your safety and the safety of others involved. Proper PPE training ensures you know how to use equipment effectively, reducing exposure to harmful mold spores.
Consider these essential factors:
Protection from inhalation: Respirators filter out mold spores, safeguarding your lungs.
Skin safety: Gloves and protective clothing prevent direct contact with mold, minimizing skin irritation.
Eye protection: Goggles shield your eyes from mold particulates, preserving your vision.
Types of PPE
Choosing the right types of Personal Protective Equipment (PPE) is essential for ensuring your safety during mold remediation.
Start with respirator types; a half-mask respirator equipped with P100 filters is ideal for blocking airborne mold spores. If you’re dealing with extensive contamination, consider a full-face respirator for added protection.
Next, focus on glove materials. Nitrile gloves are highly recommended due to their resistance to chemicals and punctures, while latex gloves might cause allergic reactions.
Always wear protective eyewear to shield your eyes from irritation.
Finally, durable coveralls made of non-porous materials will keep you safe from direct exposure.
Selecting the right PPE safeguards your health and enhances your confidence in handling mold remediation tasks effectively.
Proper PPE Usage
Proper usage of Personal Protective Equipment (PPE) is essential during mold remediation to minimize health risks. Following PPE guidelines and completing PPE training ensures you’re well-prepared for the task.
Here are key points to remember:
- Always wear a properly fitted respirator to protect against airborne spores.
- Use gloves and protective clothing to shield your skin from mold exposure.
- Confirm your eyewear is sealed to prevent irritation from mold particles.
Adhering to these practices safeguards your health and fosters a sense of community among your team.
When everyone prioritizes safety, it reinforces a culture of care and responsibility.
Moisture Control and Drying
Controlling moisture is crucial for effective mold remediation, as excess humidity creates an ideal environment for mold growth. You need to focus on humidity control to prevent further issues.
Start by identifying and addressing sources of moisture, such as leaks or condensation. Use dehumidifiers to lower indoor humidity levels, ideally keeping them below 60%.
Next, make sure proper air circulation throughout the affected areas. This can be achieved by using fans to promote airflow, which helps dry out damp surfaces more quickly. Open windows and doors when possible to enhance ventilation, especially in enclosed spaces.
Check materials like drywall and wood for moisture content; if they remain damp, mold can thrive.
Implementing these steps aids in mold prevention and fosters a healthier living environment for you and your loved ones. Prioritizing moisture control and drying is crucial in your mold remediation journey.
Mold Removal Techniques
Effective mold removal techniques are essential for eliminating mold and preventing its return.
When you tackle mold growth, you improve your environment and reduce health risks associated with mold exposure.
Here are three key techniques to evaluate:
Physical Removal: Scrub surfaces with a brush and use a vacuum with a HEPA filter to capture spores effectively.
Chemical Treatments: Use EPA-approved mold removers or a mixture of water and vinegar to kill mold on non-porous surfaces.
Encapsulation: For porous materials that can’t be removed, apply a sealant to encapsulate the mold, preventing its spread and protecting your indoor air quality.
Cleaning and Sanitizing Affected Areas
Once you’ve removed the visible mold, it’s vital to clean and sanitize the affected areas to eliminate any remaining spores and prevent future growth.
Start by using effective mold cleaning techniques, such as a mixture of water and detergent or commercial mold removers. Apply these solutions to surfaces with a sponge or cloth, ensuring thorough coverage. For porous materials, consider disposal, as they may harbor spores.
Next, employ sanitization methods to kill any lingering mold spores. Use an EPA-approved disinfectant, applying it according to the manufacturer’s instructions. Allow adequate contact time for effective results.
Don’t forget to ventilate the space during this process to reduce moisture levels.
Finally, inspect the cleaned areas for any signs of mold residue. Regularly monitor these spots to ensure mold doesn’t return, fostering a healthier environment for you and your loved ones.
Repair and Restoration
After cleaning and sanitizing the affected areas, it’s essential to focus on repair and restoration to ensure your space is fully functional and safe.
Implementing effective repair strategies and restoration techniques is vital in preventing future mold issues and ensuring a healthy environment.
Consider these key steps:
Assess damaged materials: Identify and remove any materials that can’t be salvaged, such as drywall or insulation, to prevent mold recurrence.
Seal surfaces: Use mold-resistant paints and sealants on surfaces to create a barrier against moisture and future growth.
Enhance ventilation: Install or repair ventilation systems to improve airflow, reducing humidity levels and discouraging mold growth.
Final Inspection and Testing
Completing the repair and restoration process sets the stage for a thorough final inspection and testing phase. During this vital step, you’re ensuring that all mold has been effectively removed and that your environment is safe.
You’ll want to follow established testing protocols, which typically involve air sampling and surface testing to identify any residual mold spores.
It’s essential to document each phase of the inspection, noting any areas that might require further attention. Engaging a certified mold inspector can provide an unbiased evaluation, giving you peace of mind.
After the final inspection, reviewing the results is significant; if any mold is detected, you’ll need to take prompt action.
This phase confirms the success of your remediation efforts and shows your commitment to keeping your home healthy for you and your loved ones.
Prevention Strategies and Maintenance
To effectively prevent mold growth in the future, it’s crucial to implement proactive strategies and maintain a consistent monitoring routine.
Start by using mold-resistant materials during construction or renovations, as these can greatly reduce the chances of mold developing. Additionally, humidity monitoring is key; aim to keep indoor humidity levels between 30% and 60%.
Here are some strategies to incorporate:
- Regularly inspect areas prone to moisture, like bathrooms and basements, for any signs of water damage or dampness.
- Use dehumidifiers in high-humidity areas to help control moisture levels.
- Ensure proper ventilation in your home, especially in kitchens and bathrooms, to allow air to circulate effectively.
Frequently Asked Questions
How Long Does Mold Remediation Typically Take?
Mold remediation typically takes one to seven days, depending on the remediation timeline and extent of mold growth. Factors like contamination level, property size, and drying time greatly influence how long the entire process lasts.
Is Mold Removal Covered by Homeowners Insurance?
Mold removal might be covered by homeowners’ insurance, but it depends on your policy’s mold insurance provisions and coverage limits. Always review your specifics to ensure adequate protection against potential mold damage and associated remediation costs.
Can I Stay in My Home During Remediation?
You shouldn’t stay in your home during remediation! It’s vital for your safety. Mold spores can compromise air quality, so following strict safety precautions ensures you return to a healthy environment free from harmful contaminants.
What Types of Mold Are Most Harmful?
Toxic molds, like Stachybotrys and Aspergillus, can pose serious health risks. You’ll need proper mold identification techniques to recognize these harmful types and ensure your home remains a safe environment for you and your loved ones.
How Much Does Professional Mold Remediation Cost?
Wondering how much professional mold remediation costs? Typically, it ranges from $500 to $6,000. Factors influencing pricing include mold inspection costs, the extent of contamination, and necessary repairs to ensure a safe environment.
Recap
Effective mold remediation isn’t just about removal; it’s about understanding the underlying conditions that foster growth. By meticulously following each step—assessing, containing, and controlling moisture—you’re eradicating mold and safeguarding your environment. Remember, neglecting prevention strategies can lead to recurrence, reinforcing the theory that sustainable solutions require ongoing diligence. Your commitment to thorough remediation and maintenance will ensure a healthier space, ultimately transforming your home into a mold-free sanctuary.
Recent Posts
Storm Damage Ceiling Leak Restoration Guide
After a storm, you need to stop the ceiling leak fast and check for sagging,
What Is 24/7 Burst Pipe Water Removal?
When a burst pipe floods your home, water can spread faster than you’d think. 24/7
What Are Effective Toilet Backup Cleanup Solutions?
When dealing with a toilet backup, it’s essential to act quickly and methodically. Start by