Contents
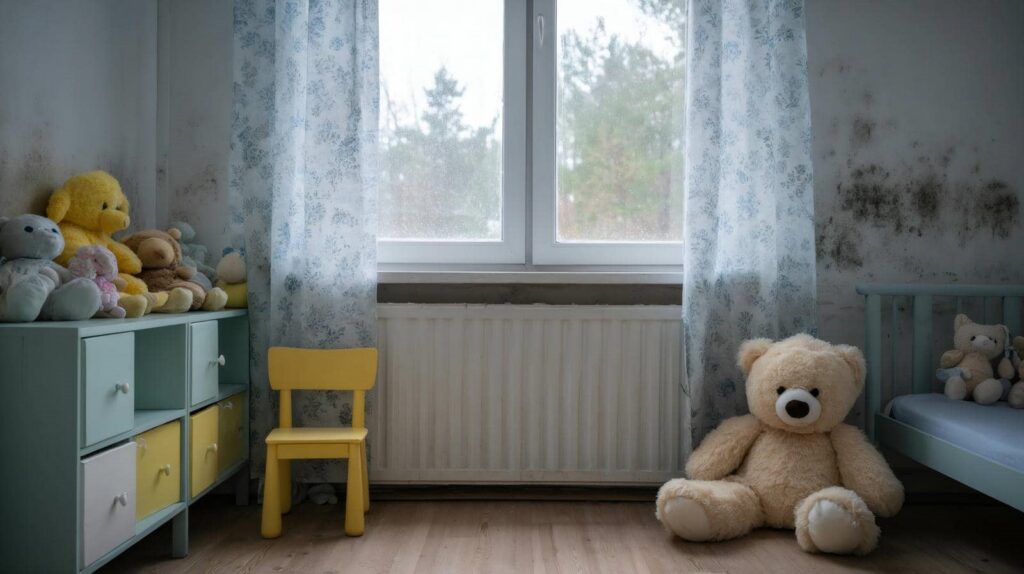
Did you know that homes with water damage will develop mold within 24 to 48 hours if not properly addressed? To effectively manage this risk, it’s essential to follow a systematic approach to mold remediation. From evaluating the damage to monitoring humidity levels, each step plays an important role in preventing mold growth. Understanding these steps can make a significant difference in protecting your home and health.
Key Takeaways
- Inspect all affected areas thoroughly and document the severity and location of water damage to identify mold-prone zones.
- Remove standing water immediately using pumps or vacuums, and ensure thorough drying with dehumidifiers and air movers.
- Wear appropriate protective gear, including gloves, goggles, and respirators, to safeguard against mold spores during cleanup.
- Maintain humidity levels below 60% to prevent mold growth, using hygrometers to monitor moisture consistently.
- Seek professional help for persistent mold issues and implement long-term moisture control strategies to prevent recurrence.
Assess the Extent of Water Damage
Before you start any mold remediation process, it’s crucial to assess the extent of water damage thoroughly.
Begin your water damage assessment by inspecting all affected areas, including walls, ceilings, and floors. Use moisture detection tools like hygrometers and infrared cameras to identify hidden moisture that could foster mold growth.
Pay special attention to dark or hidden spaces, as these areas often retain water and can lead to extensive mold infestations.
Document your findings meticulously, noting the severity and location of damage. This information will guide your remediation efforts and help you prioritize tasks.
Remember, a thorough assessment aids effective mold removal and promotes a sense of safety and belonging in your home.
Wear Protective Gear
When tackling mold remediation, it’s essential to wear protective gear to safeguard your health. Start with protective clothing, like long-sleeved shirts and pants, to minimize skin exposure. Choose fabrics that are thick enough to prevent mold spores from penetrating.
Next, wear gloves during the entire process; gloves usage is vital as they protect your hands from harmful substances and prevent contamination. Opt for nitrile or rubber gloves for maximum protection.
Safety goggles are also a must; they shield your eyes from mold spores and irritants, helping you maintain clear vision throughout the job.
Finally, invest in a respirator mask equipped with HEPA filters. This will safeguard your lungs from inhaling harmful spores and allergens.
Identify and Isolate Affected Areas
Start by evaluating the extent of water damage to pinpoint all affected areas.
Once identified, seal off these contaminated zones using appropriate materials to prevent mold spores from spreading.
Employ protective barriers to ensure a safe working environment throughout the remediation process.
Assess Water Damage Extent
Evaluating the extent of water damage is essential for effective mold remediation, as it helps you identify and isolate affected areas promptly.
Start by determining the water source; whether it’s a leak, flooding, or a burst pipe. Conduct a thorough damage evaluation by inspecting walls, floors, ceilings, and furniture, looking for discoloration, warping, or dampness.
Use moisture meters to pinpoint hidden moisture levels, which can indicate where mold may develop. Document your findings to keep track of the affected zones and guide your remediation efforts.
Seal Off Contaminated Zones
To effectively mitigate mold growth, it’s vital to seal off contaminated zones immediately after identifying and isolating affected areas.
Begin by using mold containment strategies, such as plastic sheeting, to create a barrier around the affected space. Make certain that doors and windows are closed to prevent spores from spreading.
Next, set up air filtration systems equipped with HEPA filters to remove airborne mold particles. These systems help maintain air quality while you work on remediation.
It’s essential to monitor air pressure within the sealed area; use a manometer to ensure negative pressure is maintained.
Use Protective Barriers
Using protective barriers is essential when identifying and isolating affected areas during mold remediation.
These barriers contain mold spores and help in effective mold prevention. When setting up barriers, select appropriate barrier materials to ensure a secure environment.
- Use polyethylene sheeting to create physical barriers that block the spread of spores.
- Consider using duct tape to seal seams and edges, ensuring no air leaks occur.
- Employ negative air pressure machines to maintain airflow in a controlled manner.
Remove Standing Water
Standing water is often the first sign of a moisture problem that can lead to mold growth, so it’s crucial to address it immediately.
Begin by utilizing proper water extraction techniques. Use a submersible pump for efficient water removal, ensuring you follow the pump operation guidelines to maximize effectiveness. Position the pump in the deepest area of the standing water to facilitate ideal drainage.
If the water level is manageable, consider using a wet/dry vacuum as an alternative. This can be especially useful for smaller areas or when you’re unable to use a pump. Always wear appropriate protective gear during this process to safeguard yourself against contaminants.
Once the standing water is removed, inspect the area for hidden moisture pockets.
Dry Out the Affected Space
Once you’ve removed the standing water, drying out the affected space is essential to prevent mold growth.
Implementing effective moisture control and enhancing ventilation will ensure a thorough drying process. Here are some key steps to follow:
Use dehumidifiers: Place them in the affected area to extract excess moisture from the air.
Increase airflow: Open windows and doors to facilitate cross-ventilation; use fans to promote air circulation.
Monitor humidity levels: Utilize a hygrometer to keep track of humidity; aim for levels below 60%.
Discard Contaminated Materials
To effectively manage mold, you must identify all affected materials, including carpets, drywall, and insulation.
Once identified, dispose of these items safely to prevent further contamination.
Make certain you follow local regulations for hazardous waste to protect both your health and the environment.
Identify Affected Materials
Before you can effectively address mold issues, it’s vital to identify the materials that have been affected by contamination. Start with a thorough material sensitivity evaluation to determine which items can be salvaged and which need to be discarded.
Use mold identification techniques to inspect surfaces, determining whether mold spores have penetrated porous materials.
- Check carpets and upholstery for signs of mold growth
- Inspect drywall and insulation for water damage and discoloration
- Evaluate wooden structures for warping or fungal growth
Once you’ve identified the affected materials, prioritize removing those that are heavily contaminated to prevent further spread.
This initial step is significant in ensuring a safe and effective remediation process for your environment.
Safe Disposal Methods
When dealing with contaminated materials, it’s essential to follow safe disposal methods to minimize health risks and prevent mold spores from spreading.
First, identify items that can’t be salvaged, like wet drywall or carpeting. Seal these materials in plastic bags to contain spores and prevent cross-contamination.
Next, dispose of them according to your local hazardous waste regulations, ensuring you’re compliant with all requirements. If you’re uncertain about disposal options, consult your local waste management authority.
Avoid composting contaminated materials, as this can lead to further contamination.
Clean and Disinfect Surfaces
Effective mold remediation hinges on the thorough cleaning and disinfecting of affected surfaces. To ensure you’re effectively combating mold, employ proper surface cleaning techniques.
Start by using a mixture of water and non-toxic detergent to scrub surfaces, eliminating visible mold. After cleaning, disinfect the area with a solution of one cup of bleach to one gallon of water, making certain you wear protective gear to prevent inhalation or skin contact.
Consider these mold prevention strategies as you clean:
- Remove moisture from surfaces promptly to minimize mold growth.
- Use a vacuum with a HEPA filter for porous materials like carpets and upholstery.
- Maintain good ventilation in areas prone to dampness, like bathrooms and kitchens.
Use Dehumidifiers and Air Movers
To effectively control moisture during mold remediation, position dehumidifiers and air movers strategically in the affected areas.
Ensure that dehumidifiers are placed in the most humid spots to maximize water extraction, while air movers should be directed towards surfaces to enhance drying.
Regularly monitor humidity levels to maintain an environment that inhibits mold growth.
Optimal Equipment Placement
While it may seem straightforward, the placement of dehumidifiers and air movers is essential for effective mold remediation.
To optimize the performance of these equipment types, consider the following placement strategies:
Position dehumidifiers in the center of the affected area to maximize moisture extraction.
Place air movers at angles that direct airflow toward damp surfaces, enhancing evaporation.
Ensure there’s adequate space around both devices for unobstructed airflow.
Monitor Humidity Levels
After optimizing the placement of dehumidifiers and air movers, monitoring humidity levels becomes an essential step in mold remediation.
You should aim to maintain humidity control below 60% to inhibit mold growth. Use a hygrometer to keep track of moisture levels in affected areas.
If levels rise, adjust your dehumidifiers accordingly or increase air circulation with air movers. Regular moisture monitoring allows you to respond swiftly to fluctuations, ensuring an effective drying process.
Remember, stagnant air can trap moisture, so keep air movers running continuously until levels stabilize.
Monitor for Mold Growth
Monitoring for mold growth is vital, as early detection can prevent extensive damage and health issues.
Implementing effective mold prevention strategies is important after water damage. You should regularly inspect areas prone to moisture, like basements and bathrooms, to catch any signs of mold.
Use these monitoring techniques to stay ahead:
- Visual Inspections: Check for discoloration or fuzzy patches on walls and ceilings.
- Odor Detection: Be alert for musty smells, which often indicate hidden mold.
- Humidity Monitoring: Use hygrometers to ensure indoor humidity stays below 60%.
Seek Professional Help if Necessary
If you notice persistent mold growth despite your best efforts to control moisture, it’s vital to seek professional help. Mold can pose serious health risks and may require specialized knowledge and equipment for effective remediation. Engaging in expert consultation ensures you receive tailored advice based on the specific conditions of your environment.
Professionals can identify hidden mold sources, assess damage, and implement effective removal strategies.
Consider using professional services when mold covers a large area, or if you have underlying health concerns. Trained technicians use advanced techniques and tools to remove mold safely and prevent future growth. They also provide guidance on moisture control, crucial for long-term prevention.
Don’t hesitate to reach out for help; partnering with experts protects your home and supports your well-being. By taking this proactive step, you contribute to creating a healthier living space for yourself and those you care about.
Frequently Asked Questions
How Long Does Mold Take to Grow After Water Damage?
Mold can start growing within 24 to 48 hours after water damage, depending on water damage factors like temperature, humidity, and organic materials present. Understanding the mold growth timeline helps you act quickly to prevent further issues.
Can I Use Bleach to Kill Mold Effectively?
You can’t rely solely on bleach for effective mold removal. It’s less effective on porous surfaces and certain mold types. Instead, consider using specialized mold removers that penetrate surfaces for better results and long-term prevention.
Is Mold Removal Covered by Homeowners Insurance?
Some homeowners find mold removal covered by their insurance policy. Check your mold coverage details, as it varies widely. You’ll want to confirm specific conditions and exclusions relevant to your situation.
What Are the Health Risks Associated With Mold Exposure?
Mold exposure can lead to various health risks, including respiratory issues, allergic reactions, and exacerbated chronic illnesses. You might experience mold symptoms like sneezing, coughing, and skin irritation, which can greatly impact your daily life.
How Can I Prevent Mold Growth in the Future?
To prevent mold growth, you’ll want to use mold-resistant materials and control humidity levels in your space. Keep air circulating, fix leaks promptly, and maintain dryness to create a welcoming, healthy environment for everyone.
Final Thoughts
Effectively managing mold remediation after water damage is crucial for preserving your home’s health. By following these ten essential tips, you can greatly reduce the risk of mold growth. Are you willing to take the necessary steps to protect your living environment? Remember, even small delays can lead to serious consequences, so act quickly and decisively to ensure a safe, mold-free space for you and your family. Your proactive approach today can make all the difference tomorrow.
Recent Posts
Storm Damage Ceiling Leak Restoration Guide
After a storm, you need to stop the ceiling leak fast and check for sagging,
What Is 24/7 Burst Pipe Water Removal?
When a burst pipe floods your home, water can spread faster than you’d think. 24/7
What Are Effective Toilet Backup Cleanup Solutions?
When dealing with a toilet backup, it’s essential to act quickly and methodically. Start by